
The Molecular Constellation was a Burning Seed 2018 art installation that combined unique geometric shapes, black lights (UV), optical illusions of anti-gravity and some advanced electronics & software architecture.
A team of 20+ artists made this dream happen – following the successful cooperation of Darby Bicheno and myself in several Burn projects the Molecular Constellation was born. But, in this journey, between our “start” and “finish” points there wasn’t a straight line, if at all it was a maze – the project started from a completely different place. We pivoted so many times that we stopped counting. In general, it is not the best idea-process for an art installation but because we were experienced enough we felt comfortable with the process.
Our story begins at the beginning of 2018 when we decided to have an artwork for Burning Seed 2018 that is “Not complicated”, eco-friendly (minimal plastic use) and something we won’t have to bring back to Melbourne – i.e. no software, no electronics, use as many of-the-shelf components as possible and burn it eventually. At the end we couldn’t have been more wrong ?
Playing with concepts – 1st iteration – Cardboard dreams
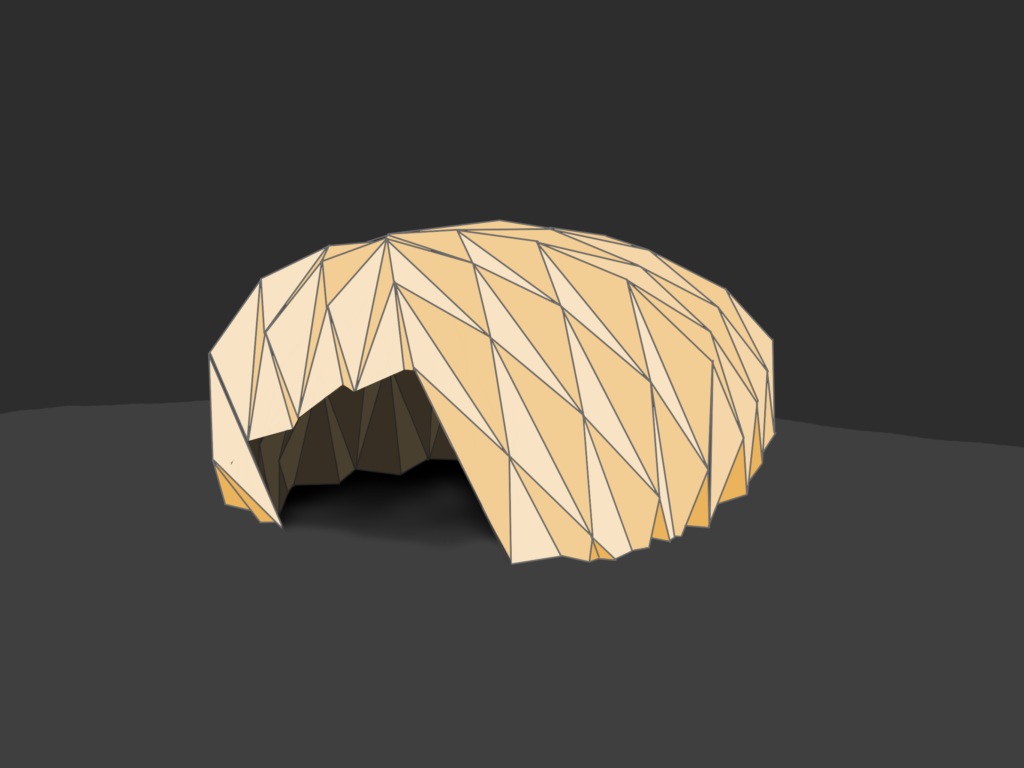
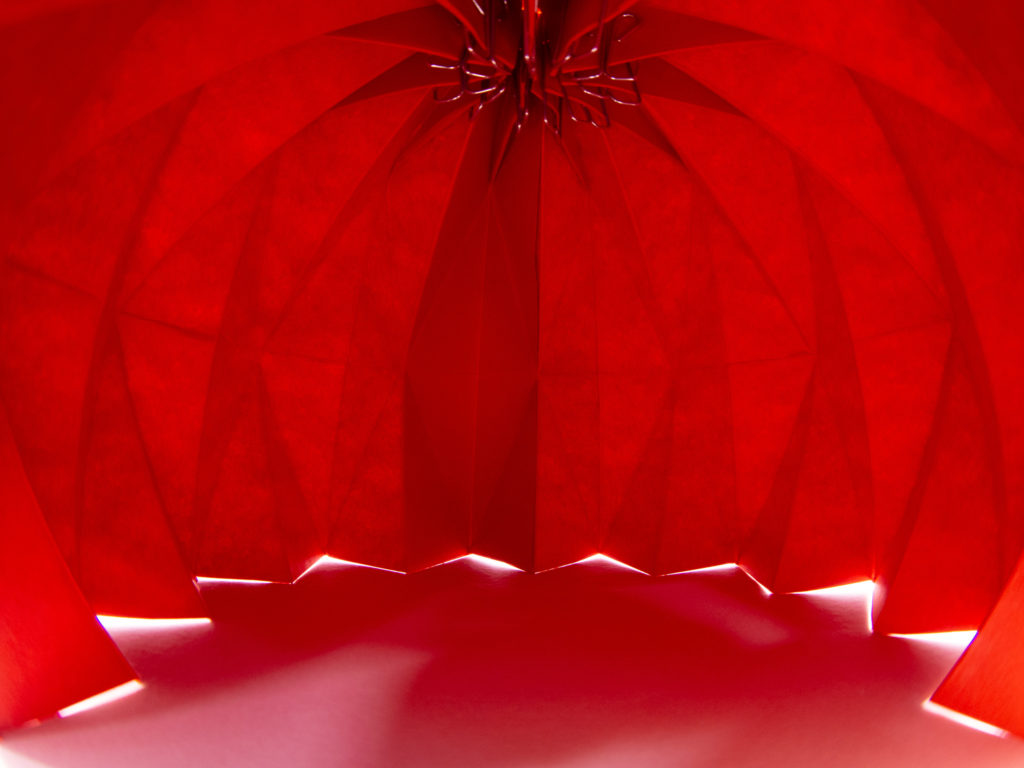
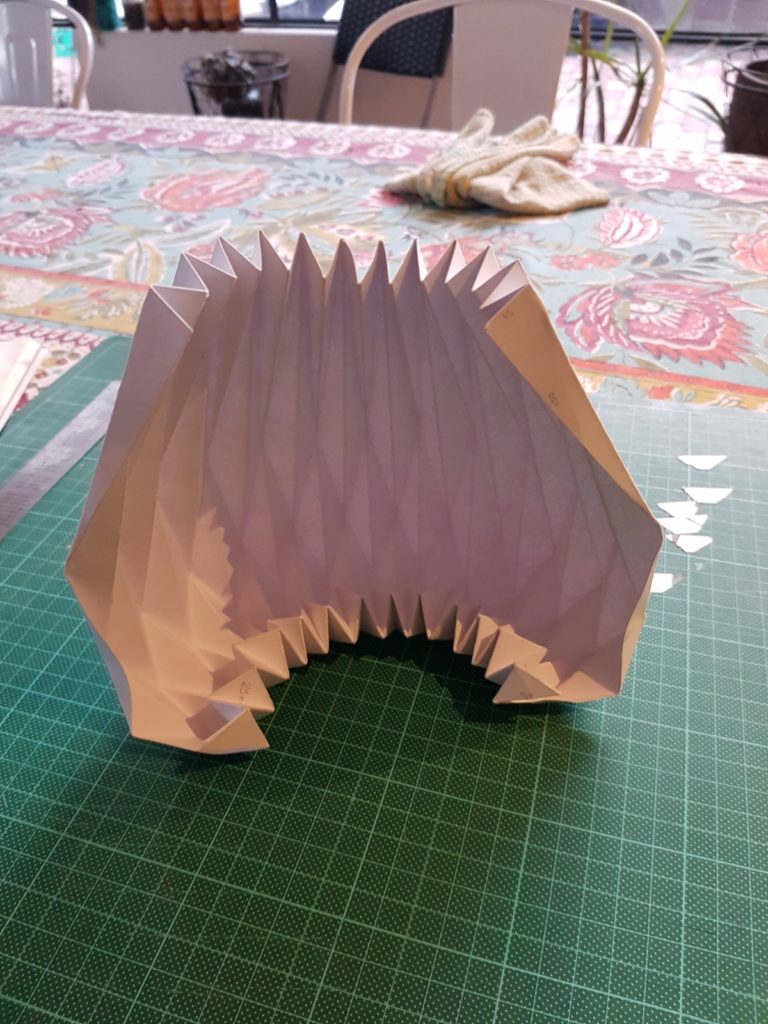
Following some origami patterns, we thought of creating a closed isolated polygon-based sphere-like space for people to relax and get disconnected from the outside world. After some research we locked on this shape:
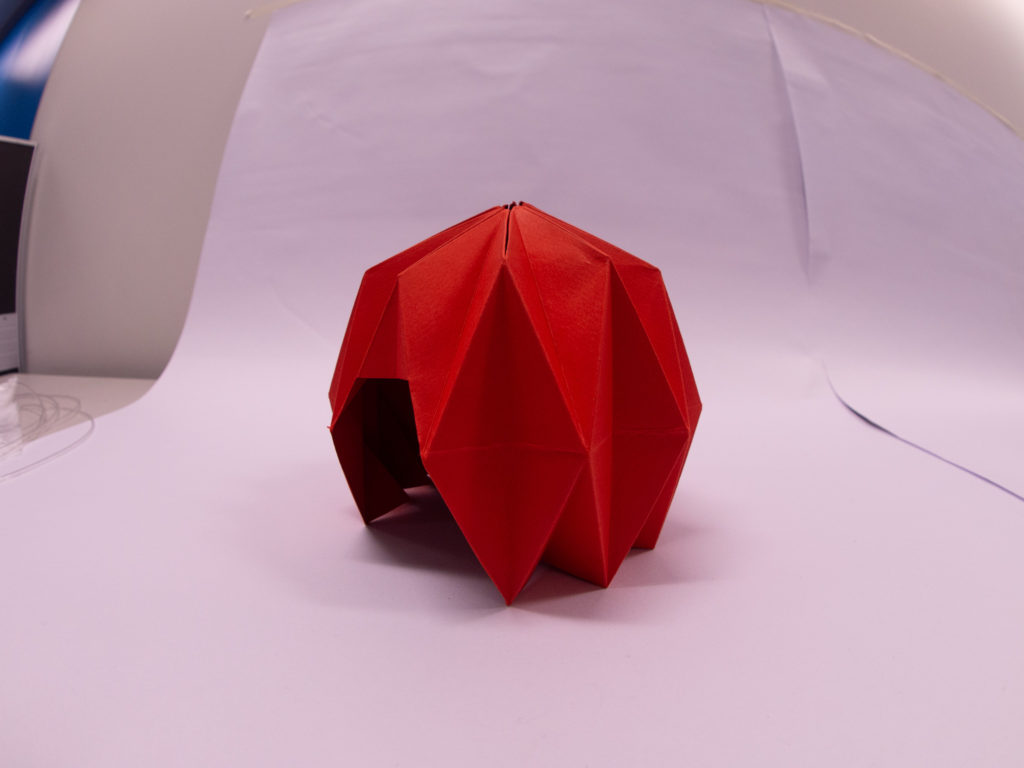
We played with it in small scale just to see how hard it will be to create a large-scale version of it – around 6m diameter. We thought to use 10mm honeycomb cardboard. The rationale behind this material was that the structure we’ll make from it will be solid, this material is relatively weather proof, we could burn it at the end of the festival, it is foldable, so transportation and packaging won’t be an issue. In addition, we could easily illuminate it from outside/inside using simple flood and spot lights – no complicated electronics.
This concept eventually crashed because of a couple of reasons:
- We realised that what you can do easily with standard cardboard from folding point of view is not so easy to do with 10mm of honeycomb cardboard
- The 6mm cardboard is not honeycomb but corrugated – which makes it much less weather proof from water point of view.
- When we asked from the Burning Seed permission to burn the artwork at the end of the event we didn’t get a clear answer is we can burn it due to possible fire ban because of the drought that year.
The above made us rethink of material that we are going to use instead of the cardboard. We liked the shape concept itself, so we decided to try to build it from Corflute – There goes our eco-friendly project…
Playing with concepts – 2nd iteration – Corflute crunching and the Devil’s Reef
Once we realised we cannot create such a big structure use using Corflute because there is not 10mm Corflute and even if there was it will be impossible to fold we decided to scale it down and instead of having the person experiencing the space from inside the sphere, we thought of having a lot of sphere-like objects in a reef-like structure. We got inspired from the Devil’s Marbles – and, we called the artwork – “The Devil’s Reef”.

This concept also created a new need. To create the “wow-effect” that the marbles are burning from the inside-out we needed to illuminate them. This was the first point that the project became a bit more complicated. Now we need individual small controllable, animated-able lights inside each sphere… this means electronics.
Scope creep #1: This was the first scope creep that we experienced. And the worst thing expects letting it in, is taking it to the next iterations as fact that was set in stone – yep, we are doing electronics in this project.
We (Hannah, Darby & I) spent 2 long afternoons + evenings trying to create the same sphere-like shape from Corflute. Eventually we made it work but it took us way-way-way more time than we originally estimated. We realised that if for two experienced makers it took 6h+ to create 1 sphere, to get the desired effect of scale we will need to have 30 of these. This wasn’t feasible. So we pivoted again.
Playing with concept – 3rd iteration – The dodecahedrons and shape exploration
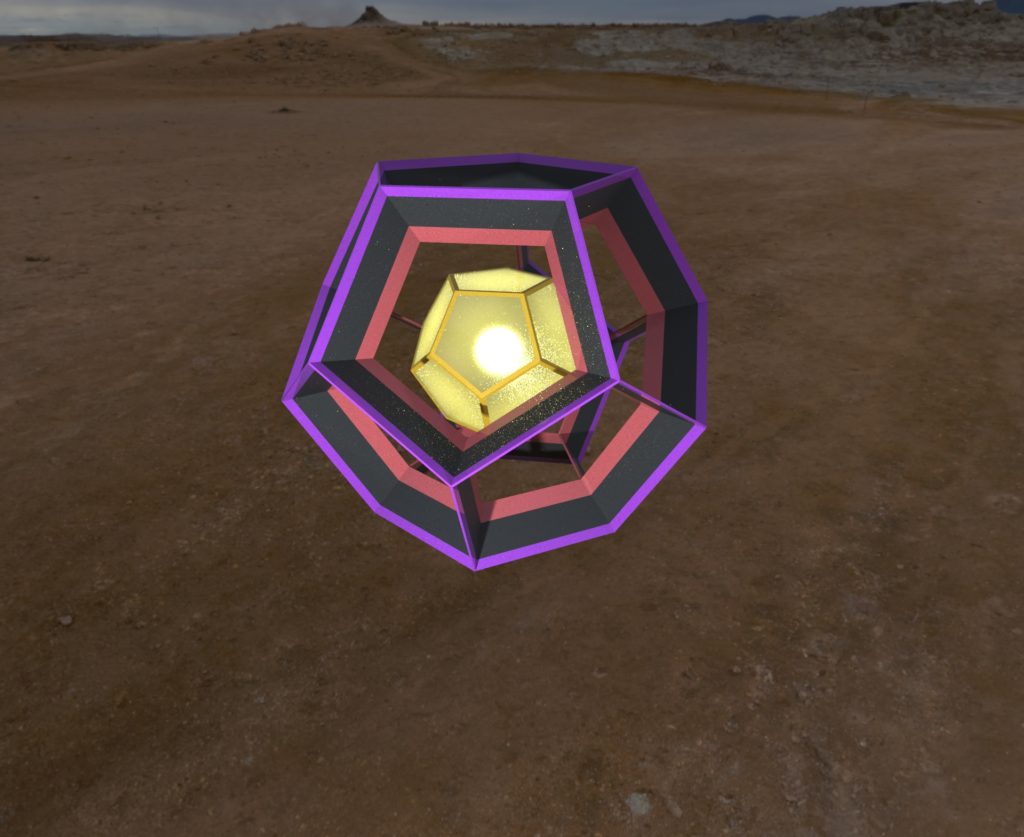
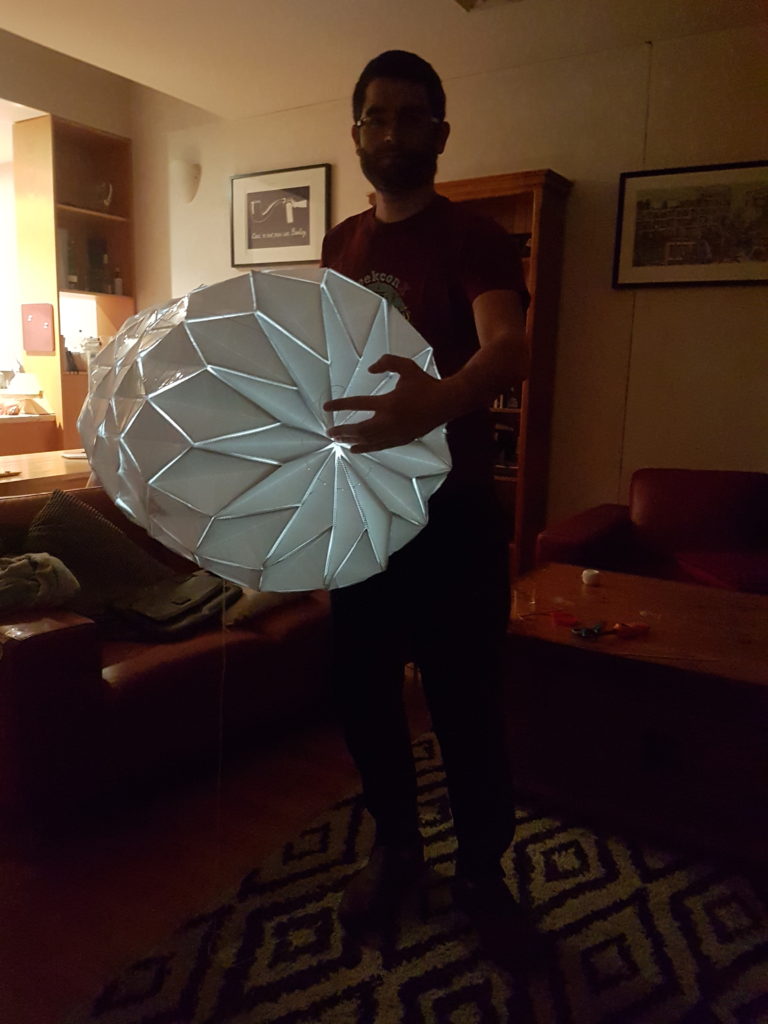
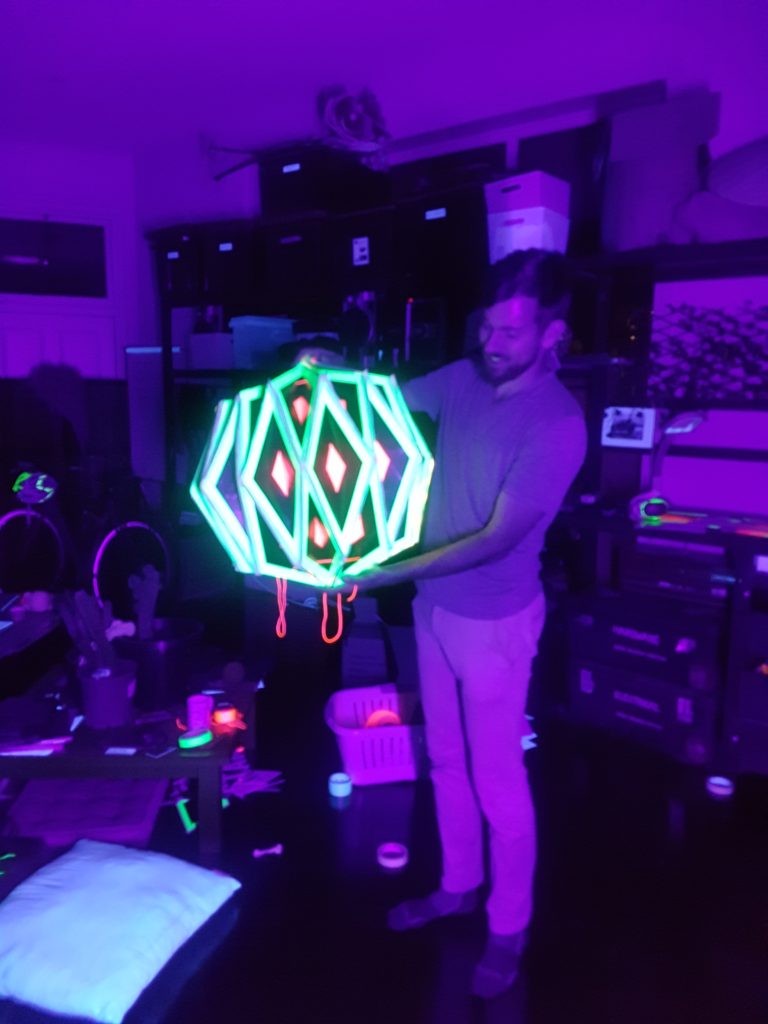
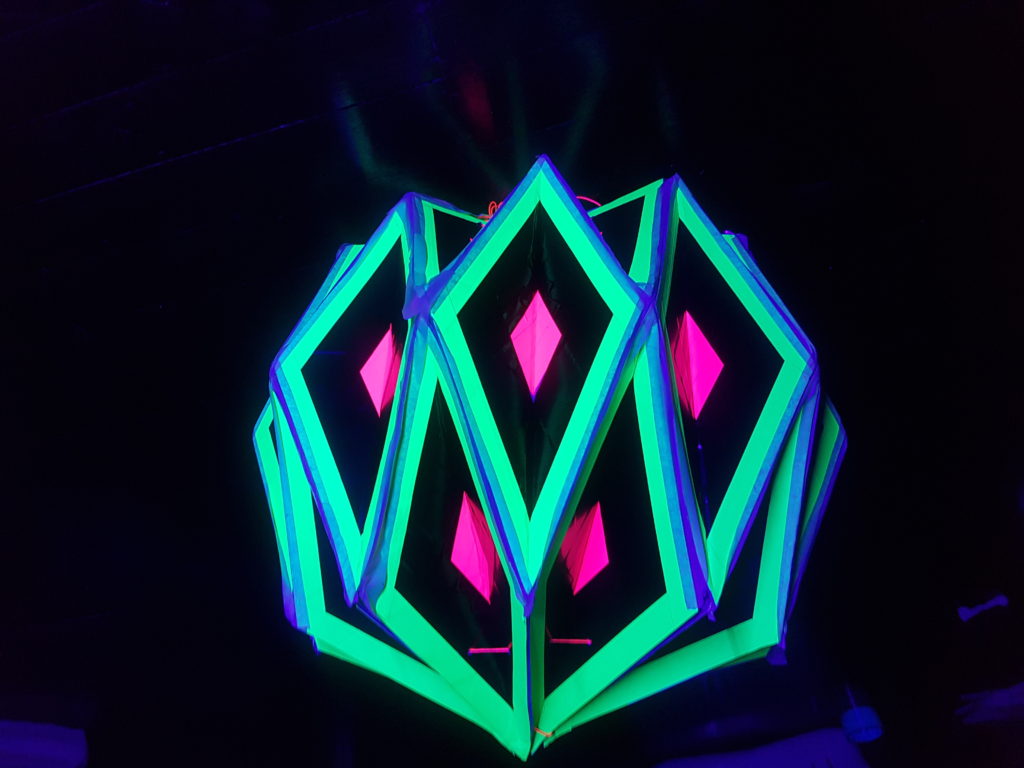
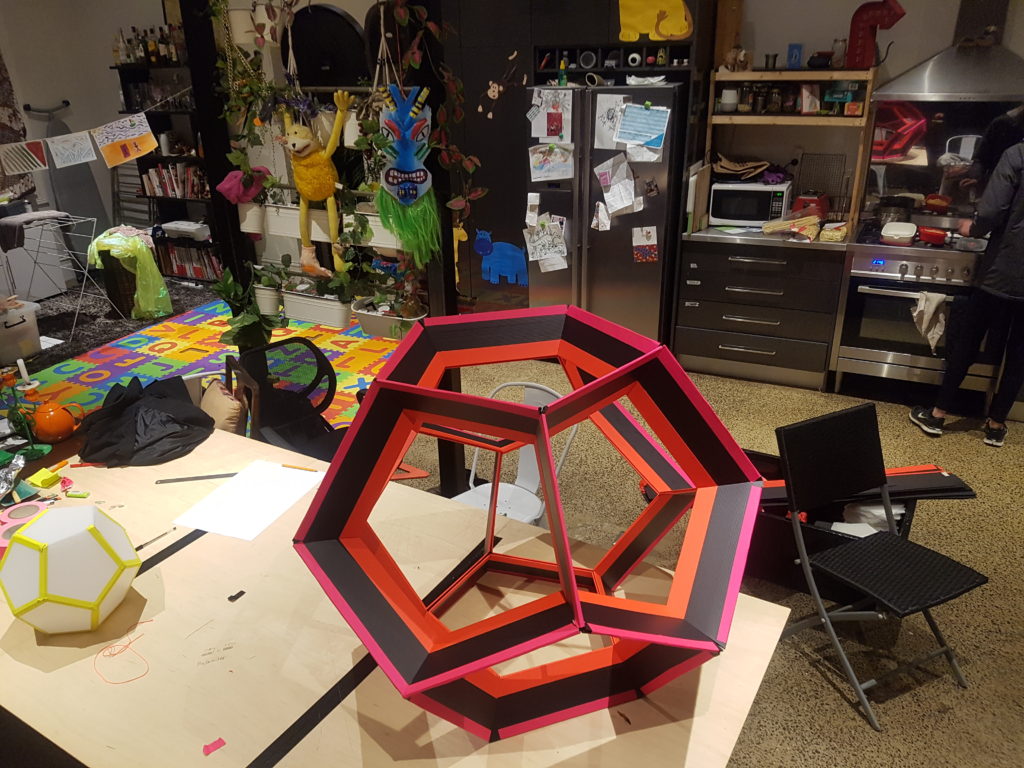
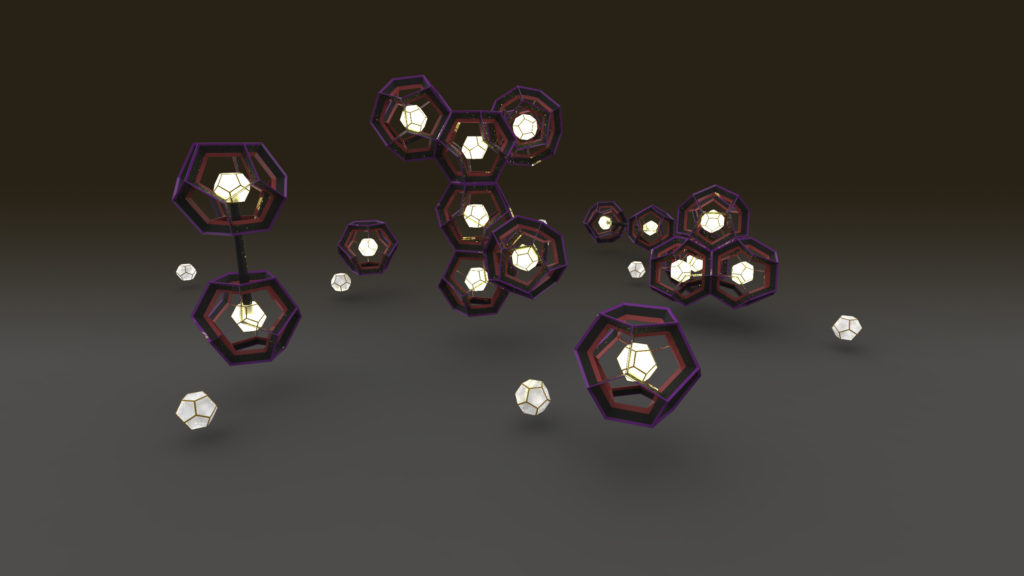
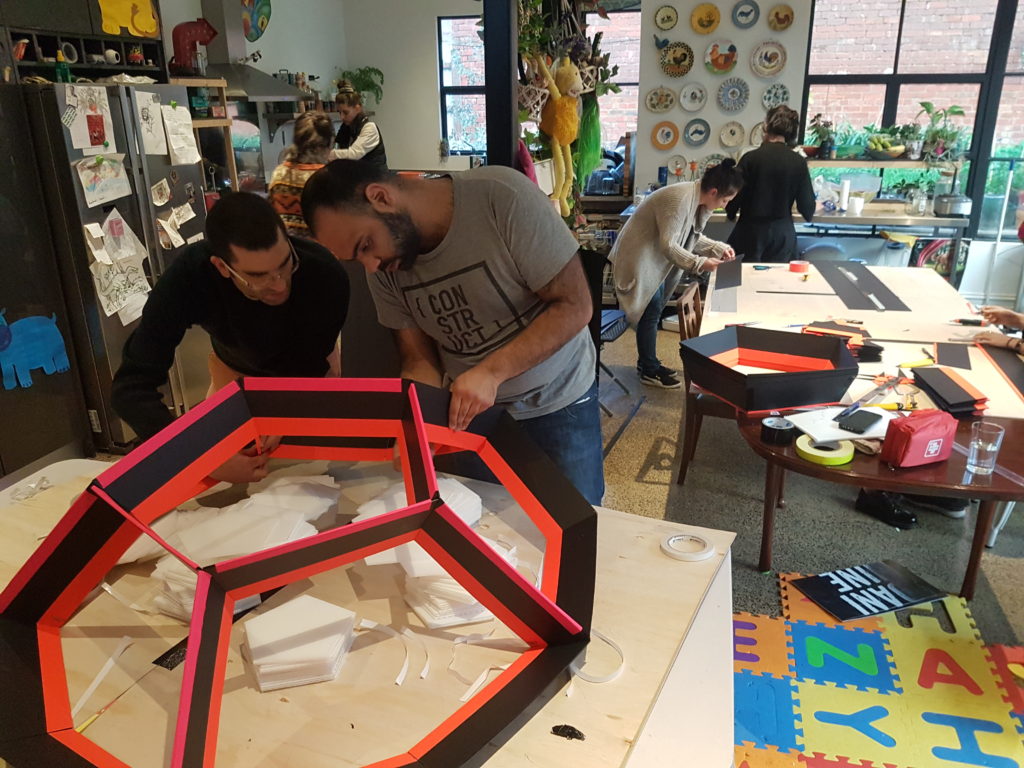
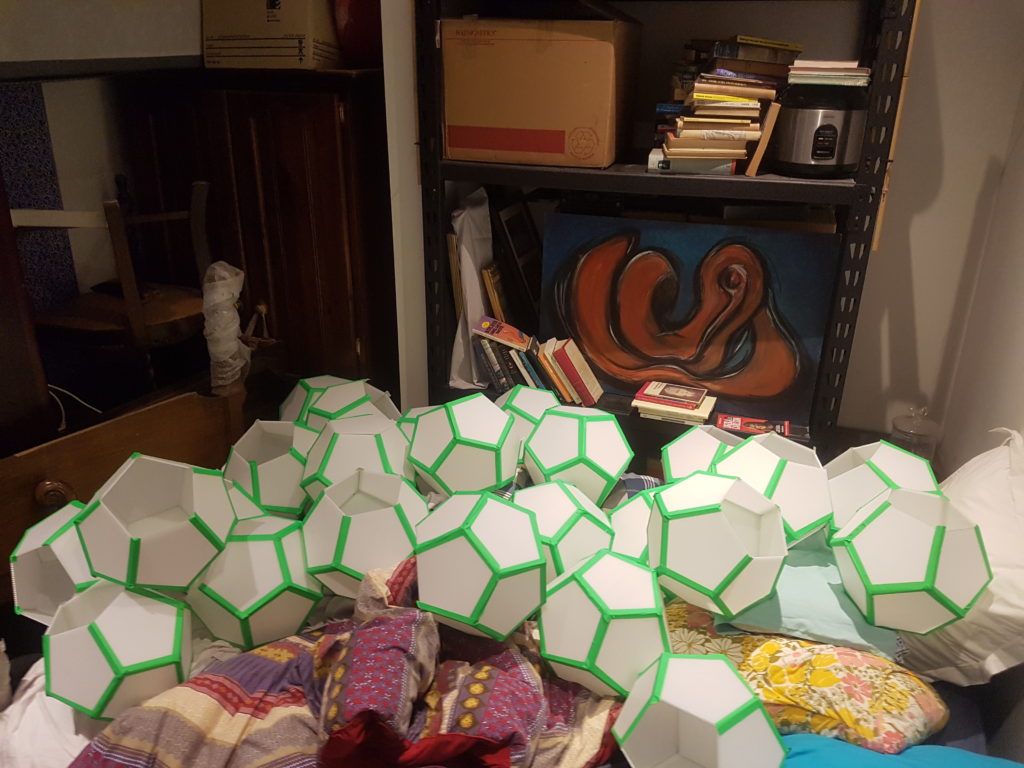
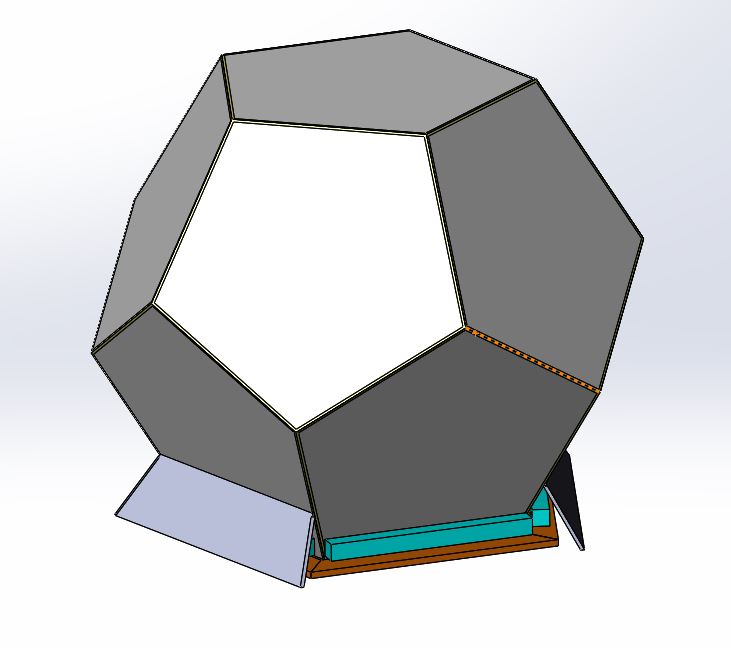
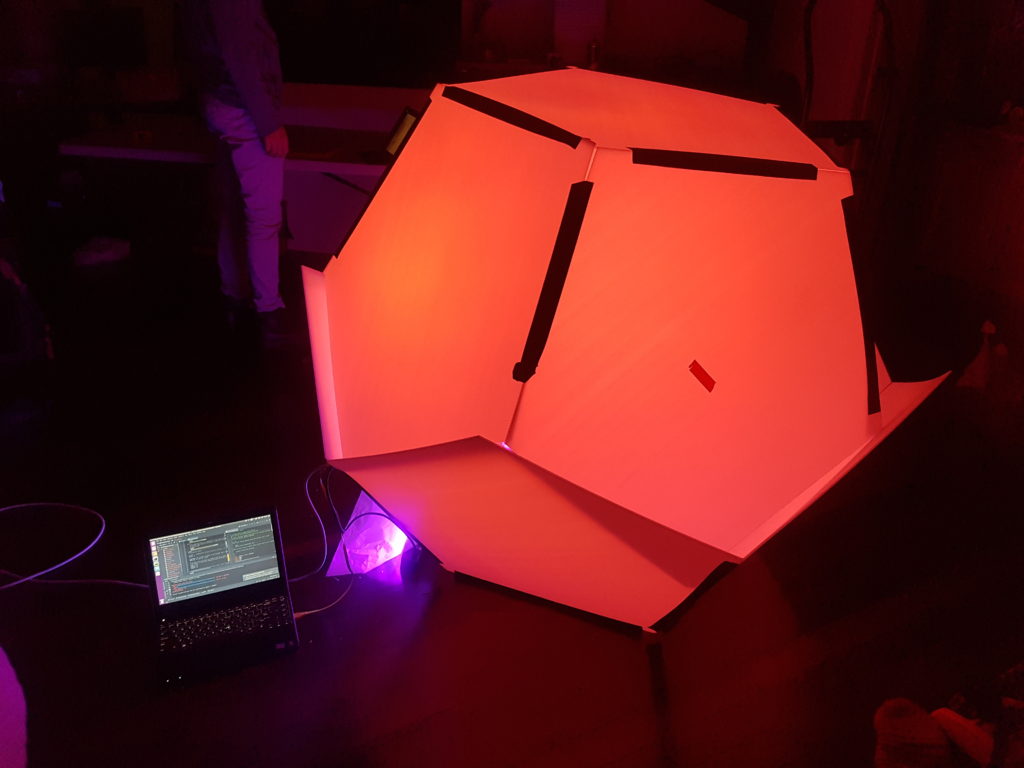
Darby did an amazing work with the design, prototyping, share research and feasibility regarding working-bee days for mass production. Together we found ourselves with the dodecahedrons – the only 3D share that could be built from identical 2D pentagons køb cialis. Each dodecahedron was “floating” inside an extruded dodecahedron that will wrap it from outside and at night time using UV light it will create the illusion that the inner dodecahedron is floating inside the extruded dodecahedron. Each of these 90cm diameter balls will have to be illuminated from the inside-out – we are “using” the electronics that we didn’t plan to have from the second iteration :\
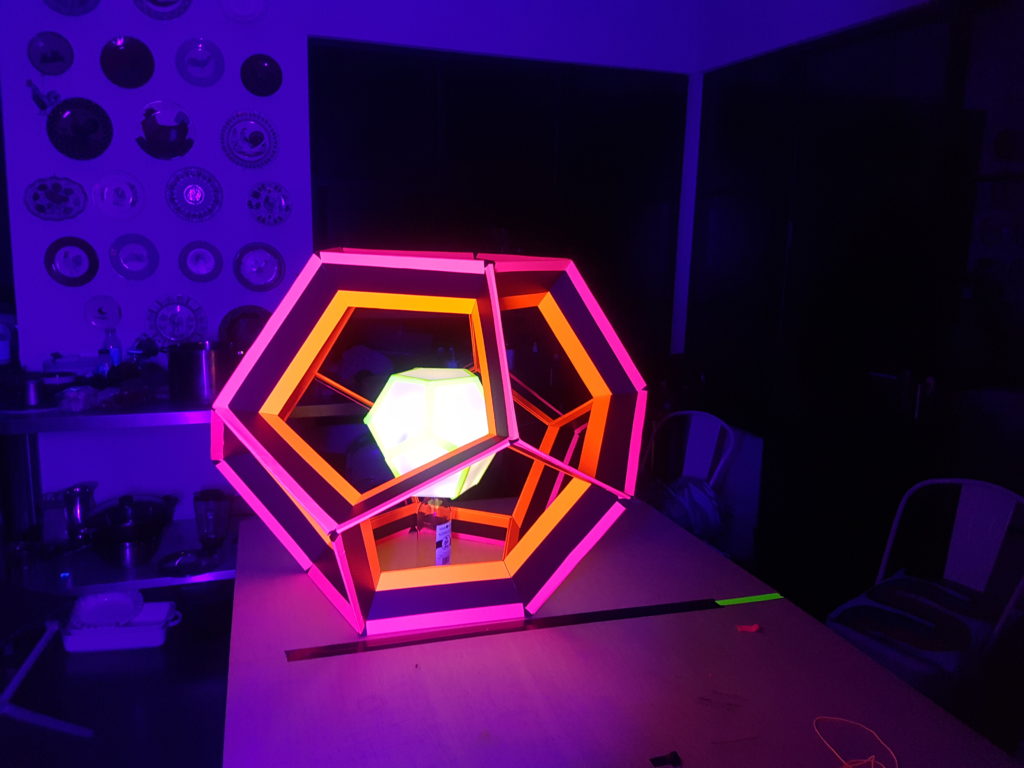
The result was very beautiful and for the first time in the project we felt that we are on track. But, as you can see in the video the inner dodecahedron is standing on a jar..
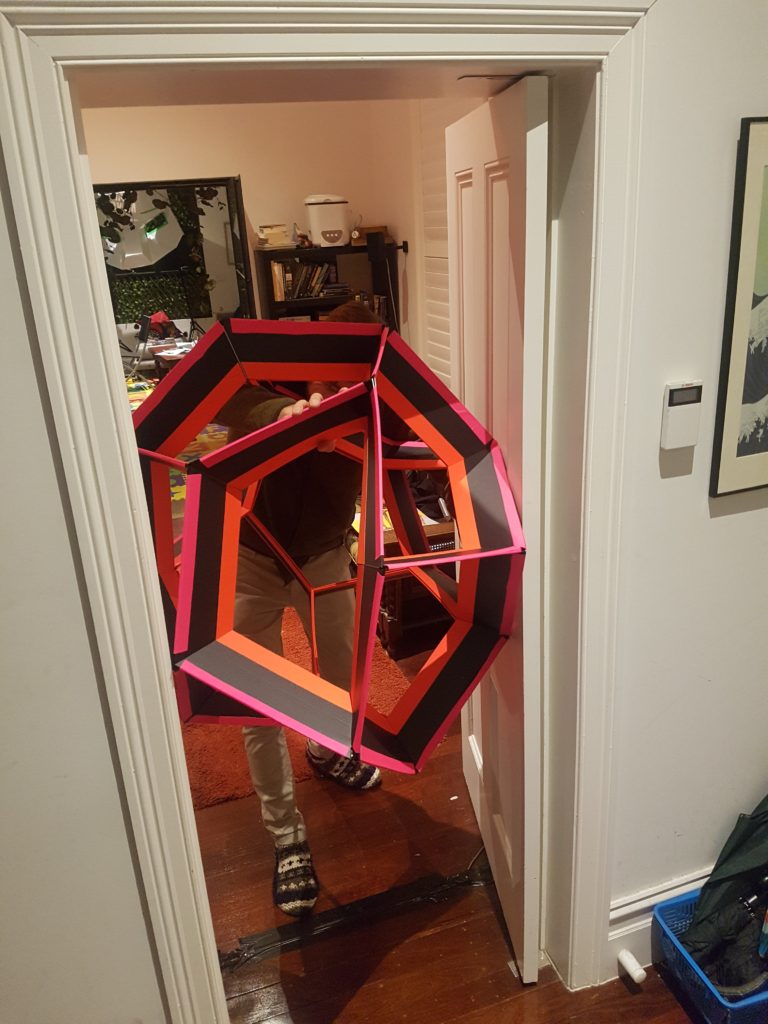
And like all the great project we didn’t plan it to fix through a door 😉 it was short by 10cm LOL
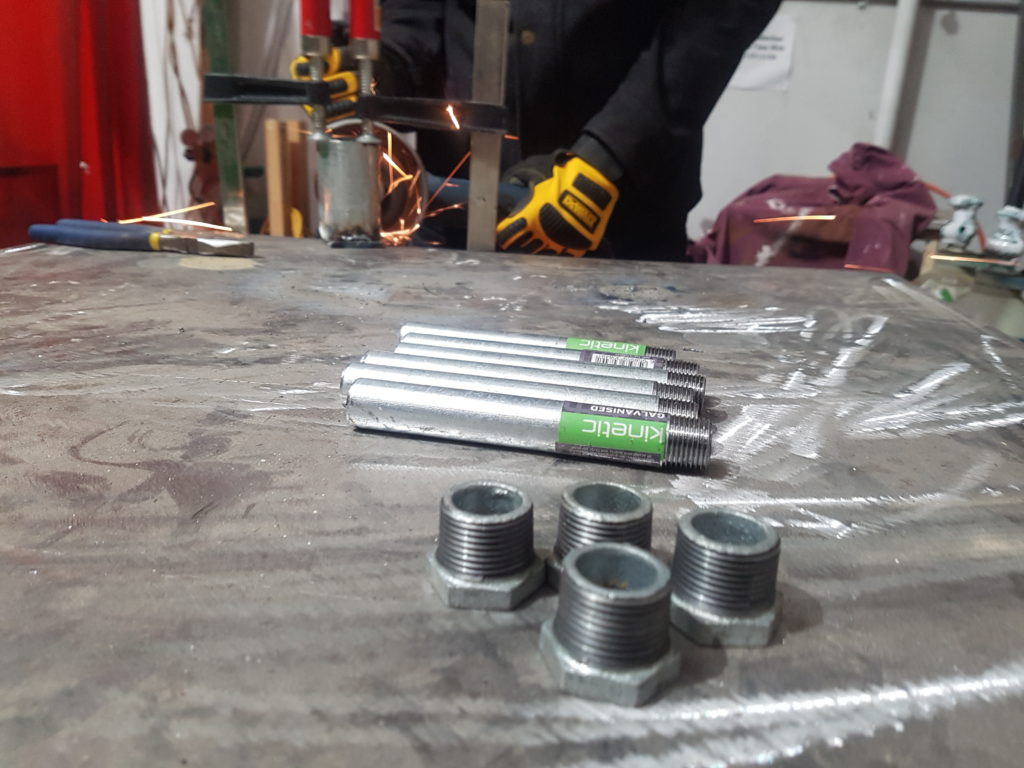
Scope creep #2: Some metal work – The Spiders, it is an Australian project and we must have spiders in it! To create the optical illusion that the inner dodecahedron is floating inside the outer one we needed to come up with a mount-support mechanisem for it. Again, with everything that we do we had in mind “how do transport it? How do we stack it?” After some design we ended up with this mount that worked quite well:

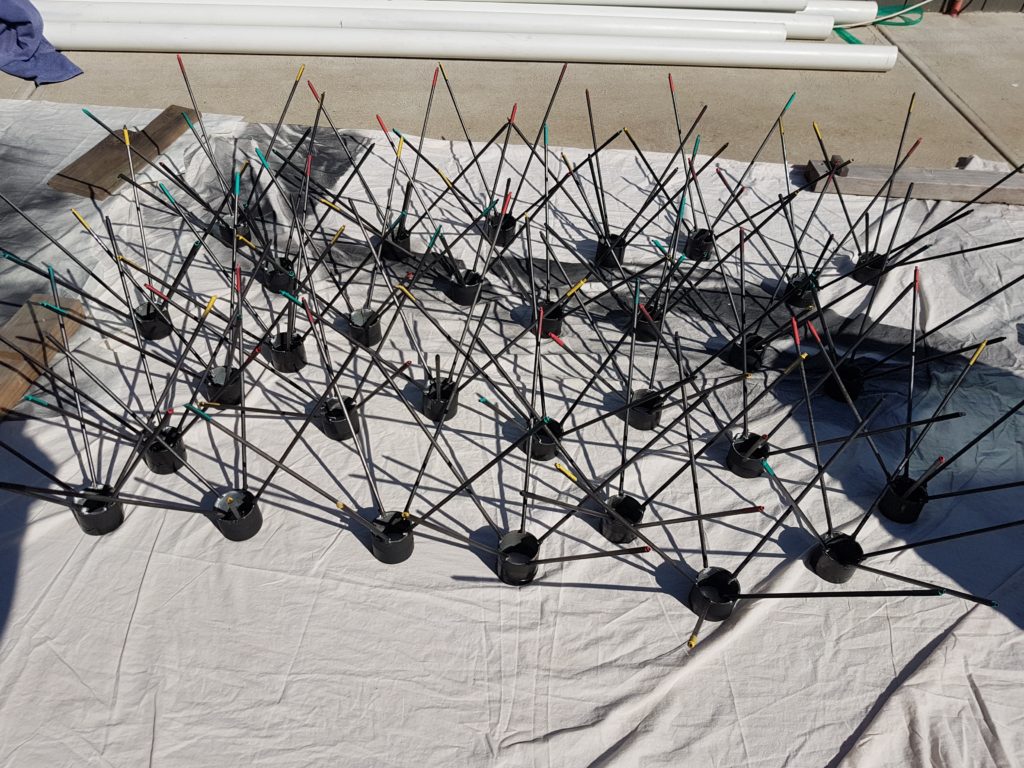
And after some integration it looked not bad under the UV light:

Following this prototyping stage, we were very happy with the basic building block, we realise that stacking it the way we planned originally wouldn’t work because of two main things:
- It just doesn’t look as good as the original closed spheres
- It will require a not-so-simple metal skeleton
Playing with concept – 4th iteration – The Insomnicas
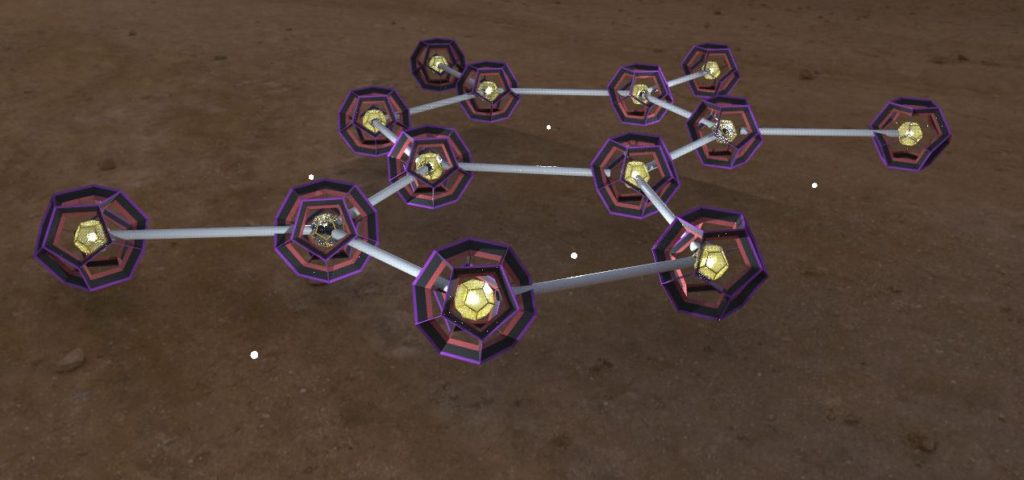
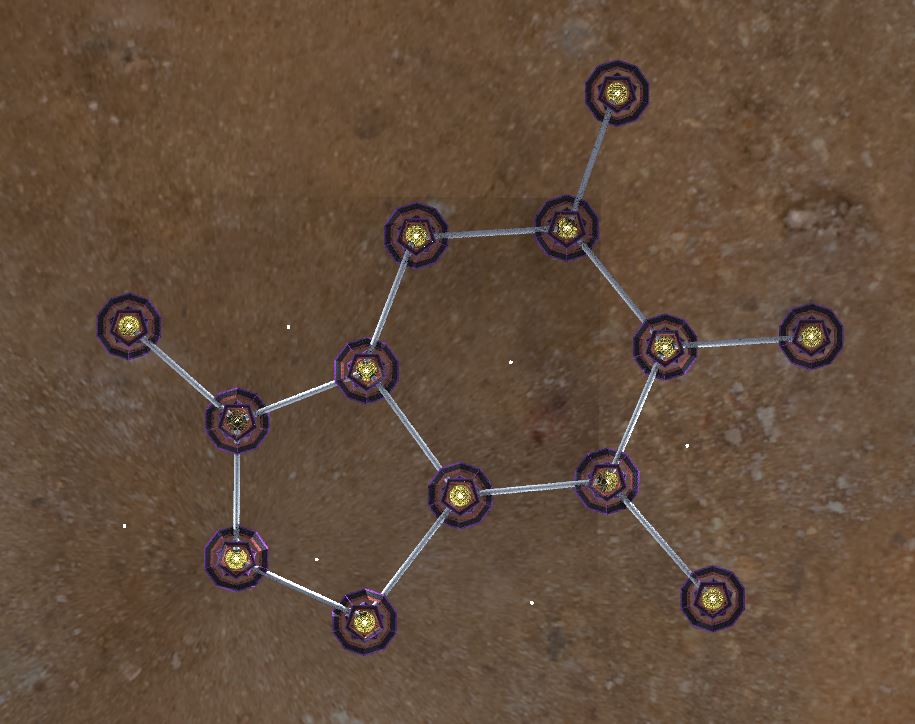
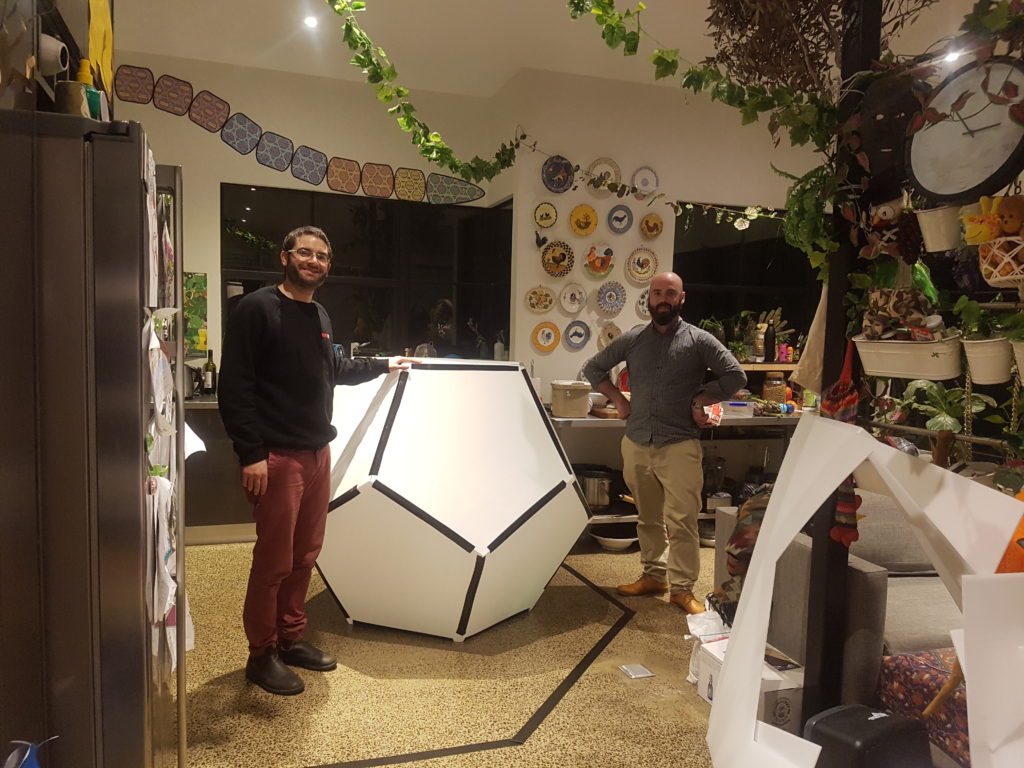
So we pivoted again. The new dodecahedron-based building blocks look like a node in a molecule, so, instead of having a reef of something that looks like nodes of a molecule – why not creating a molecule structure? Since we are living in Melbourne, which has the best coffee in the world, creating a caffeine molecule seems like the right idea. And so, it was, we had couple of more working-bee days in which our amazing crew created tens of dodecahedron.


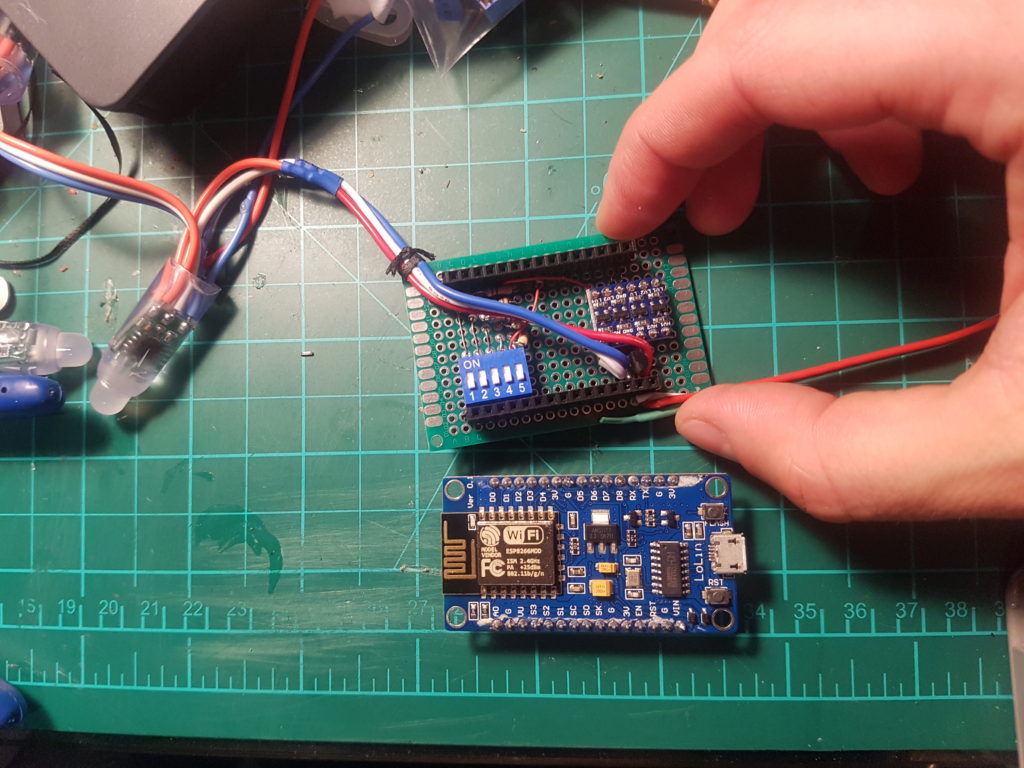
Scope creep #3: Software – now that we solidified our concept we realised that instead of having a simple flash effect in each node we will need to do something more elegant – like animation. The main reason is that now each node is not randomly placed – instead, each has a predetermined location and animation sequence is unavoidable. So, we let the biggest time eater enter our project – software ? we wanted to avoid running data cables all over the nodes and getting into trouble in mapping them, so, I decided to try a concept that I’ve been playing (in my mind) a lot – wireless animations control.
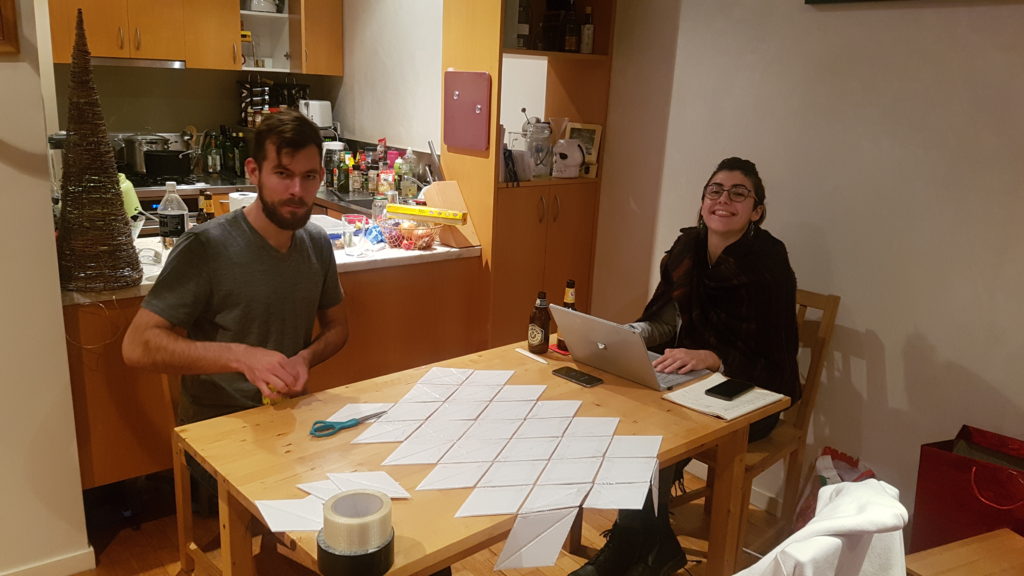
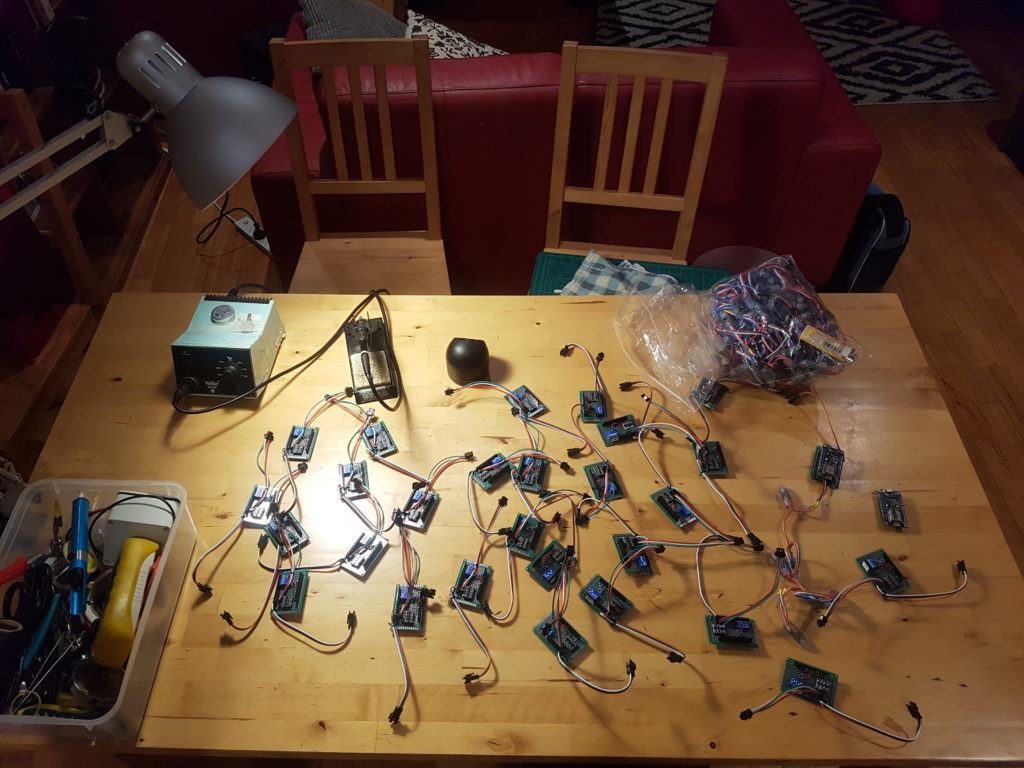
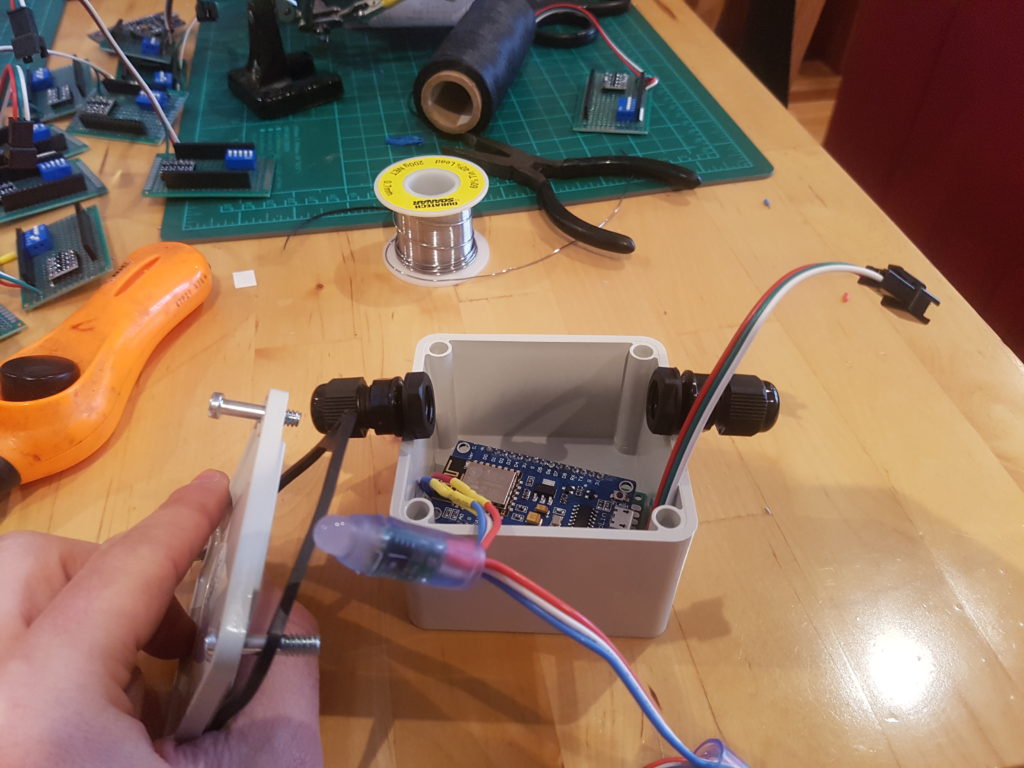
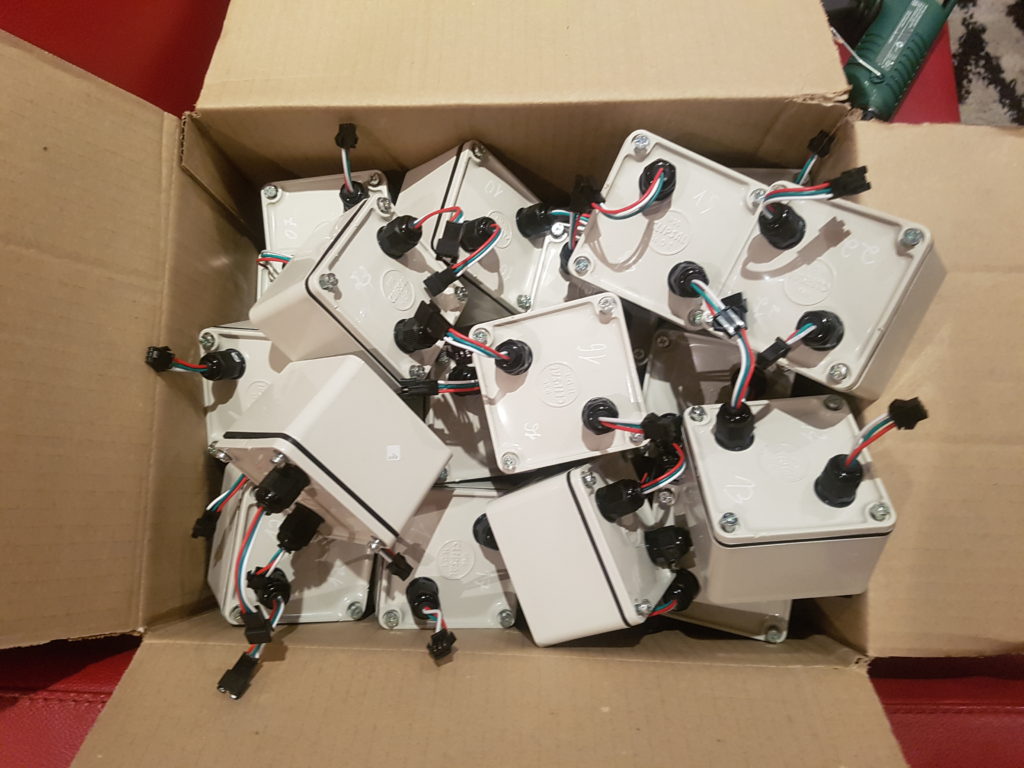
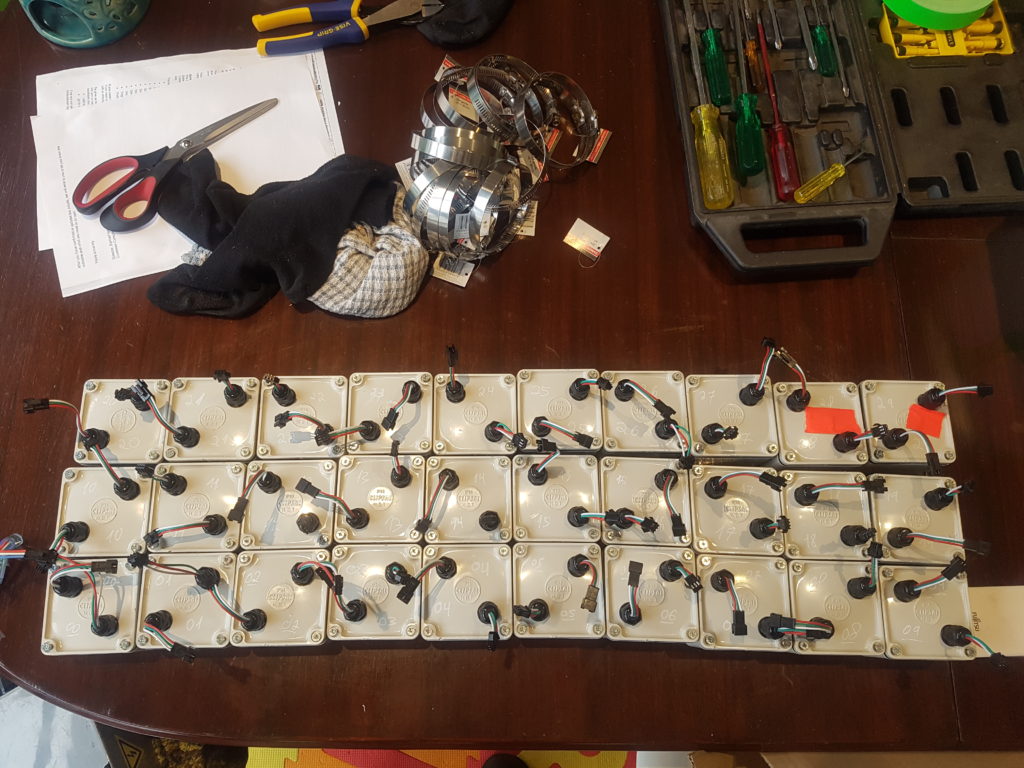
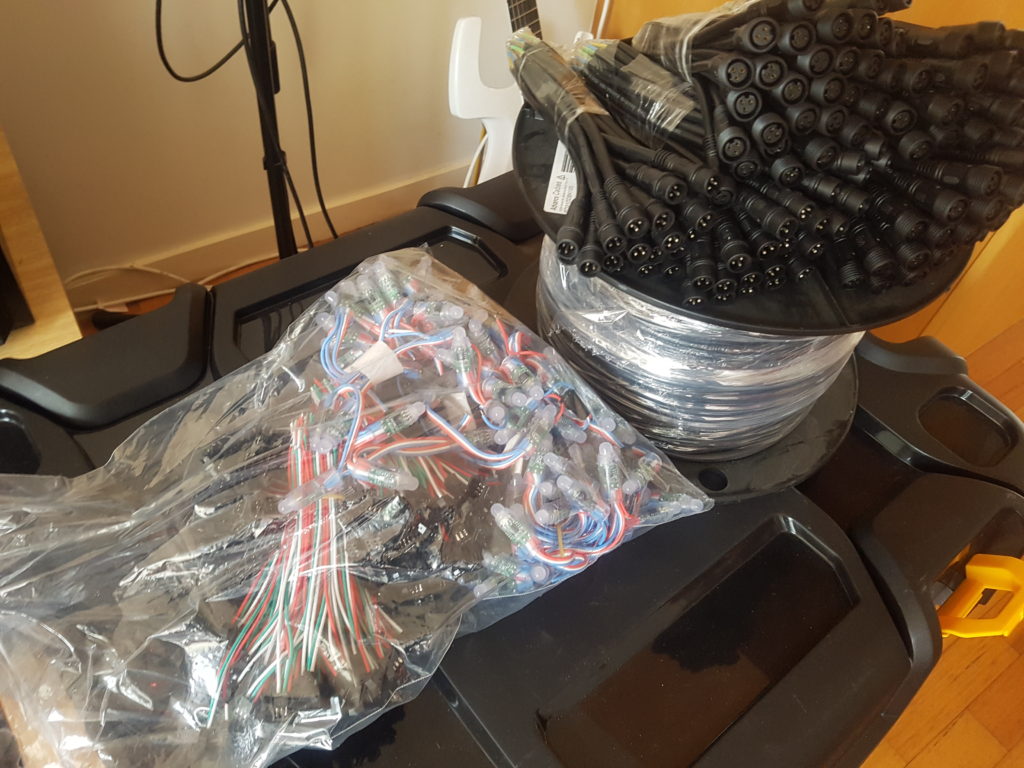
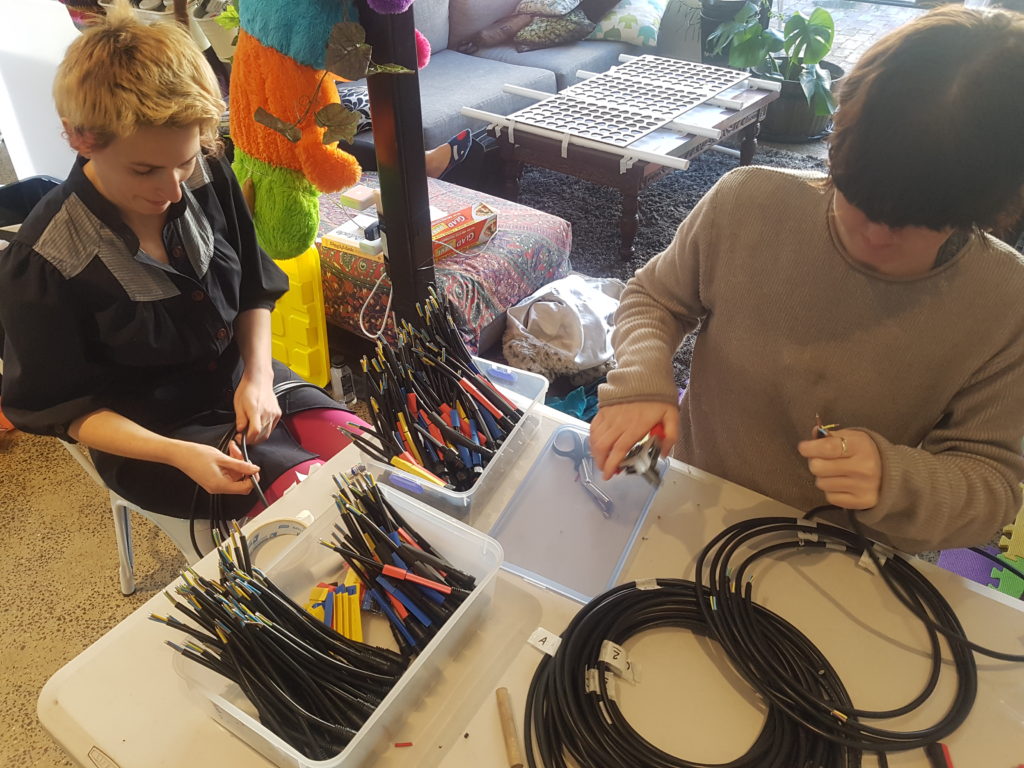
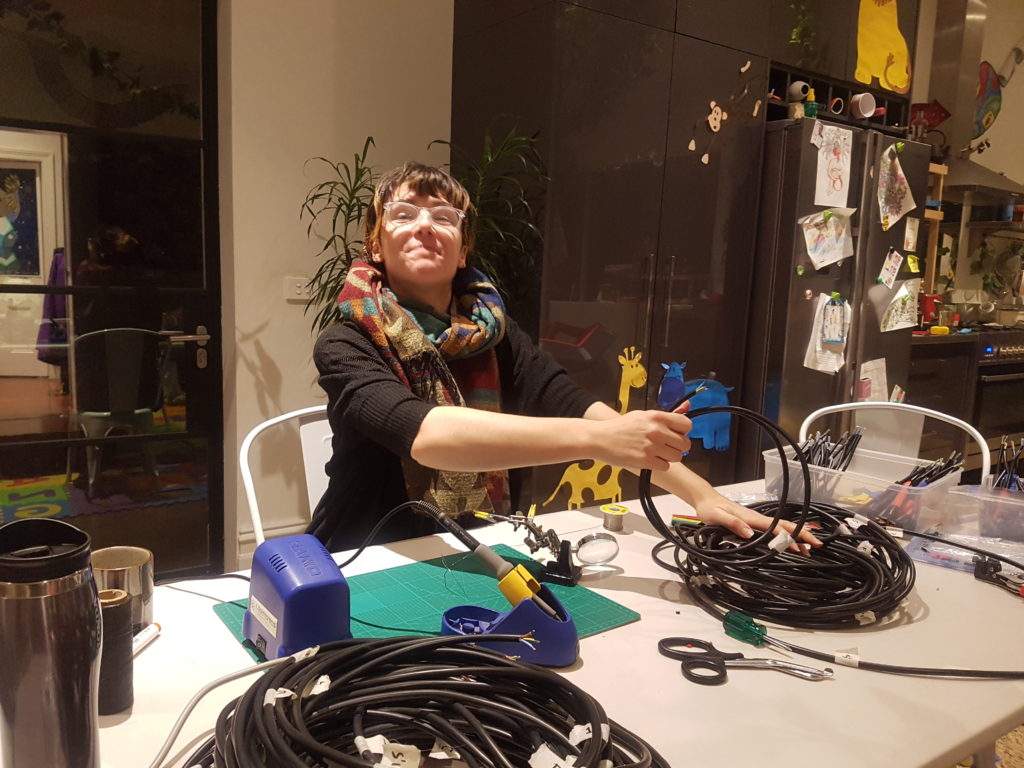
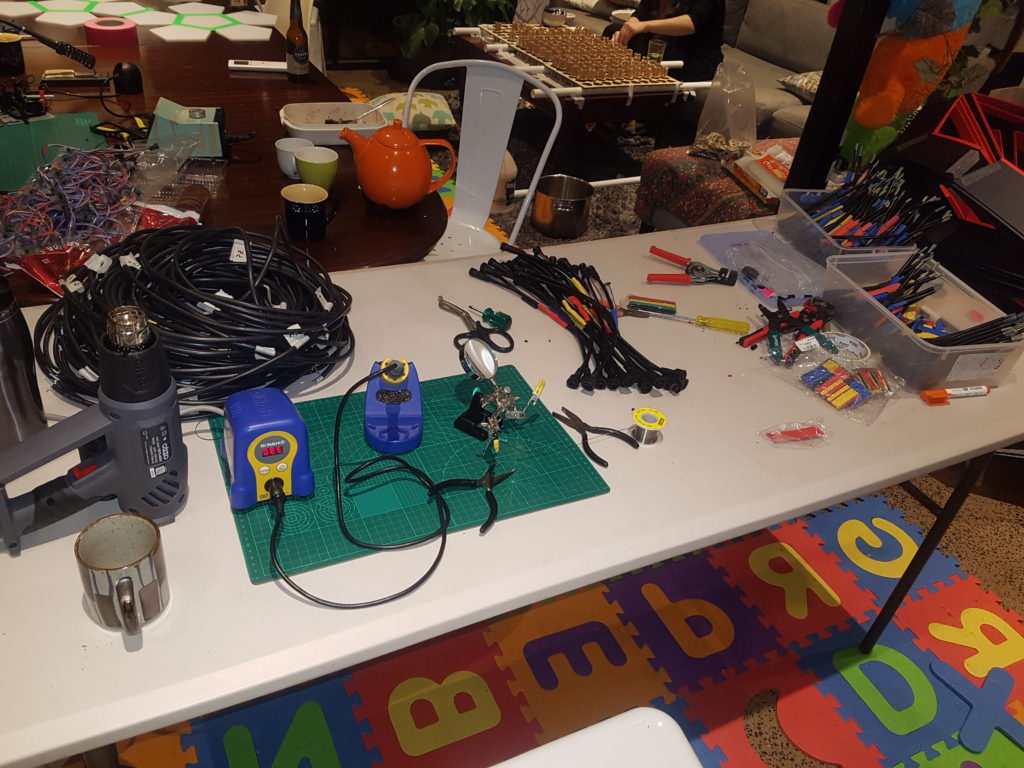
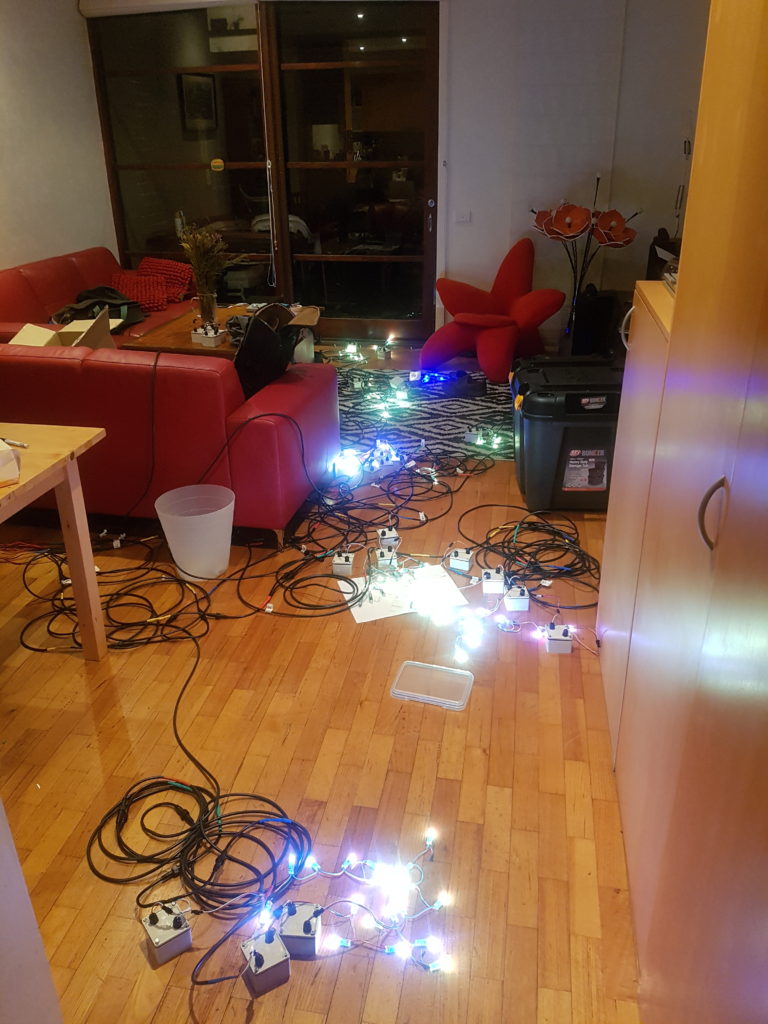
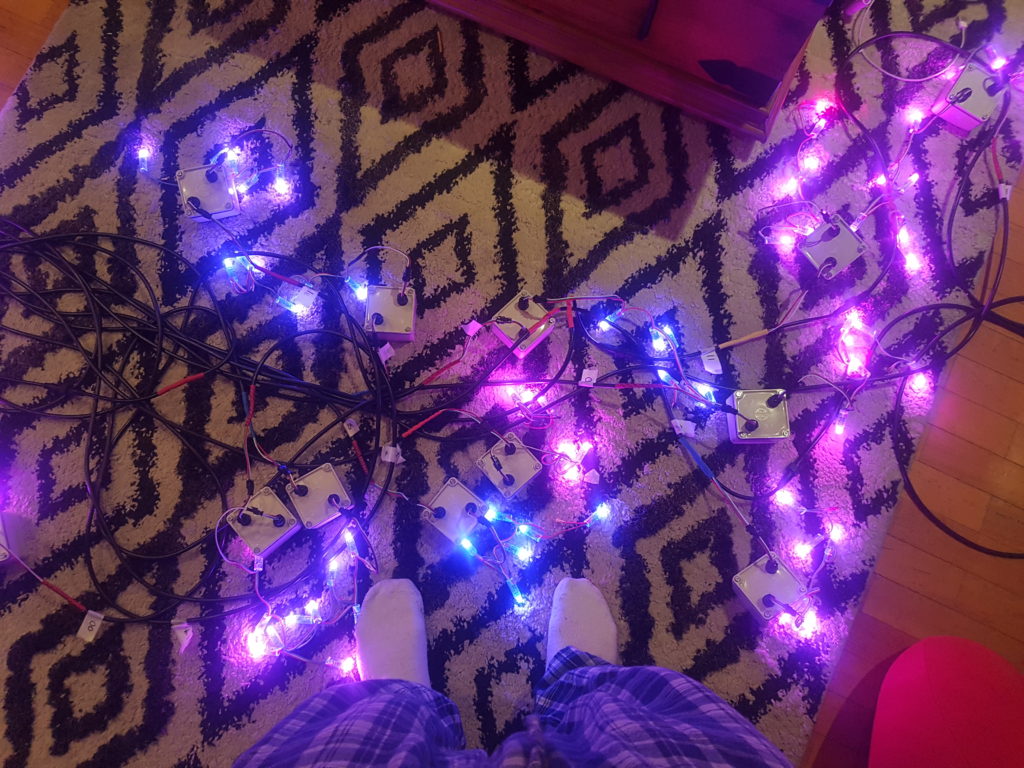
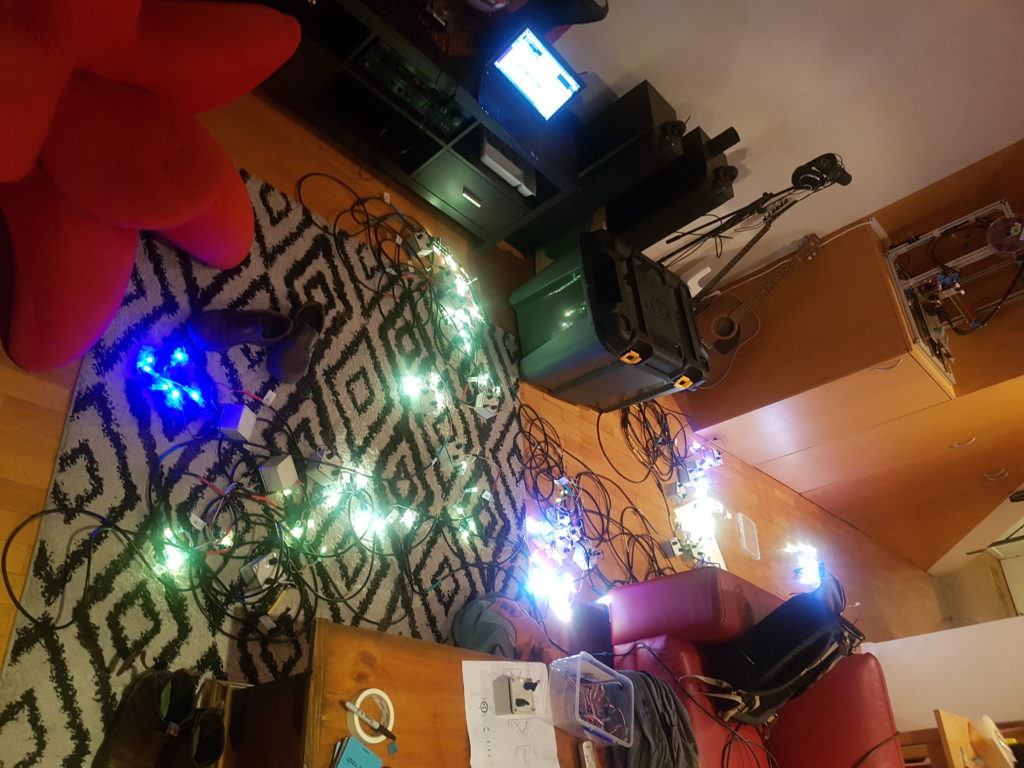
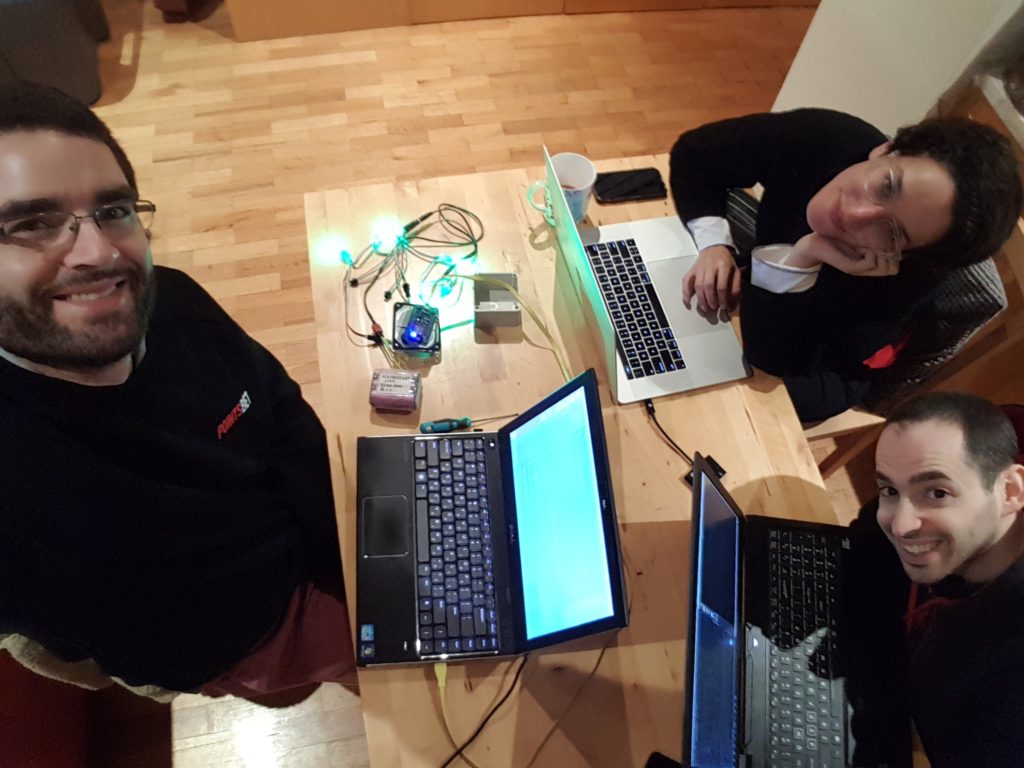
But, before we could support this radical idea, we needed to create the electronic infrastructure for it. For that an amazing team of 5 fairies joined me and learn how to strip, solder, cut and tie electronic components for our project:
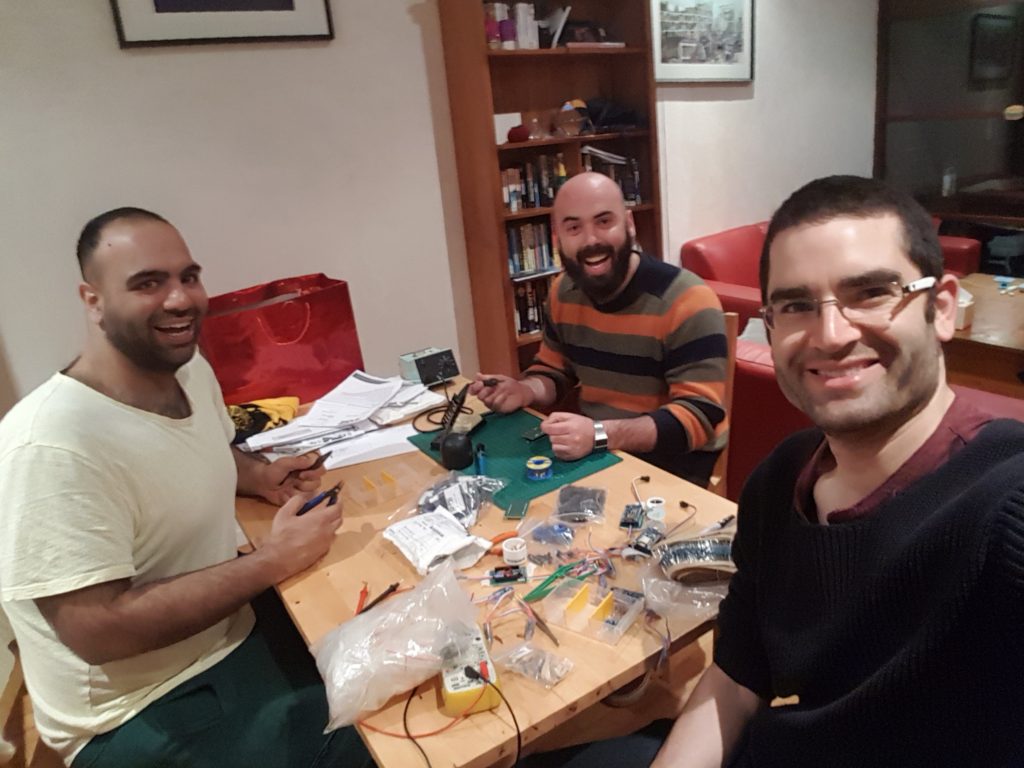
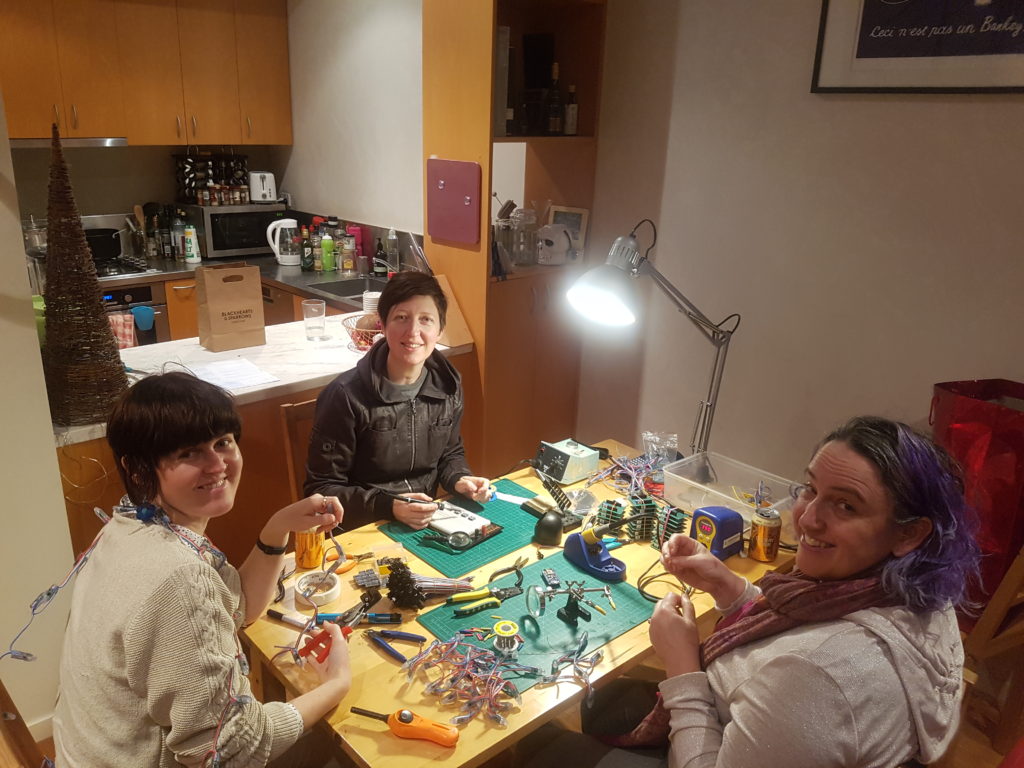
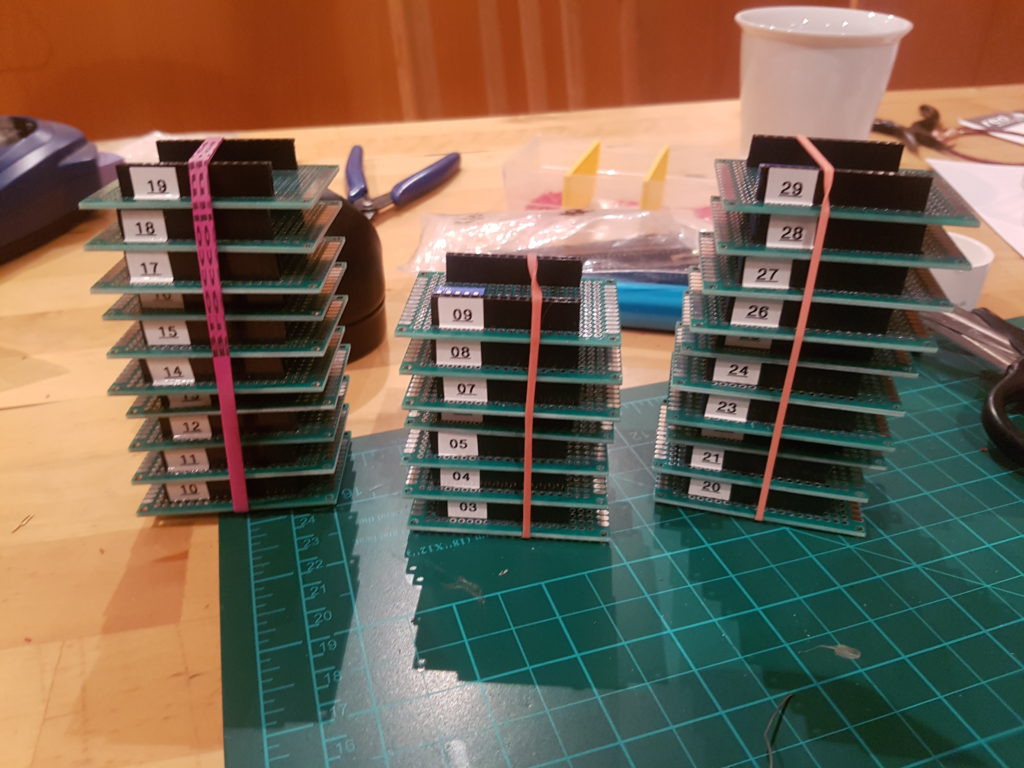
It took almost 2 weeks in an effort that will make any Shenzhen sweatshop proud. We made it and created 30 wireless waterproof nodes and LED chains for our projects.
Everything was going very well expect one thing – after most of the dodecahedrons were ready we realised that what looks good on CAD will not look good in the real world, or, will be very had to create the same experience. The main issue was that our beautiful molecule-like structure will look good only if one can see it form above or if it was hanged perpendicularly to the ground. The first option means that we will have to:
- Put the molecule on the floor and hope that people will see that it is molecule and could walk inside it.
- Hang it high up in the air – logistic nightmare, not safe, ugly – all the polls/star picket will be exposed

The second option of hanging it perpendicularly to the ground was so complex from engineering point of view that we didn’t even consider it. The first option would risk the artwork and because of the point of view it might not look like the caffeine molecule that we had in mind.
Playing with concept – 5th iteration – Molecular Constellation
So we pivoted again, for the last time. It was only 2 months before the event, plenty of time, right?
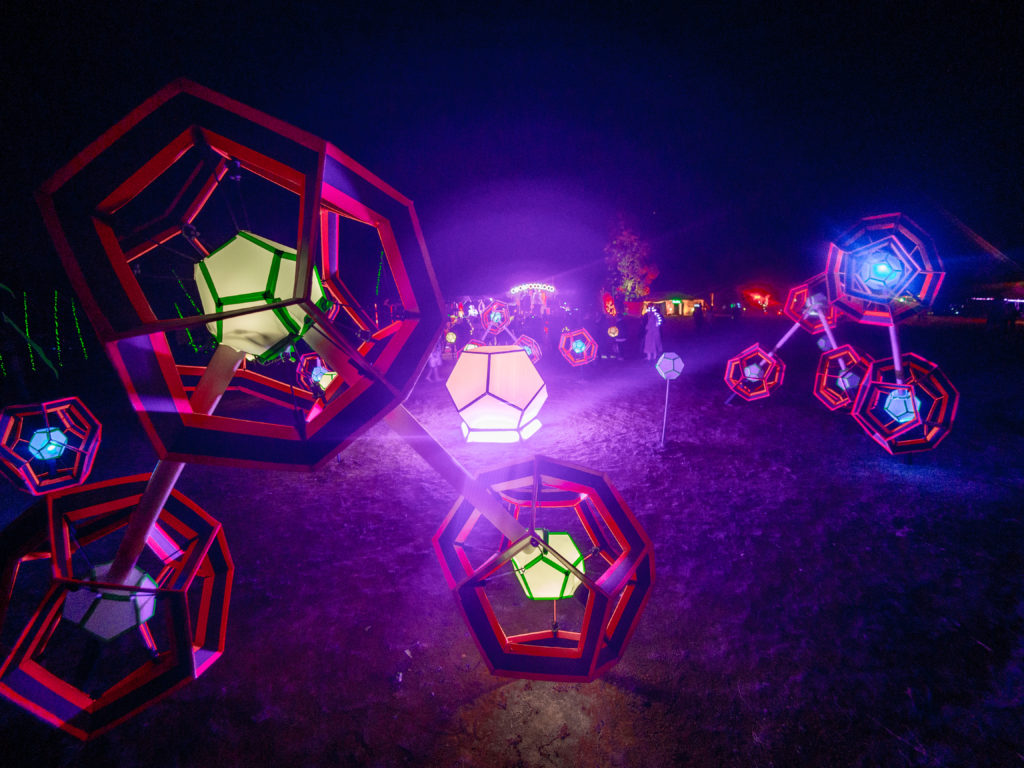
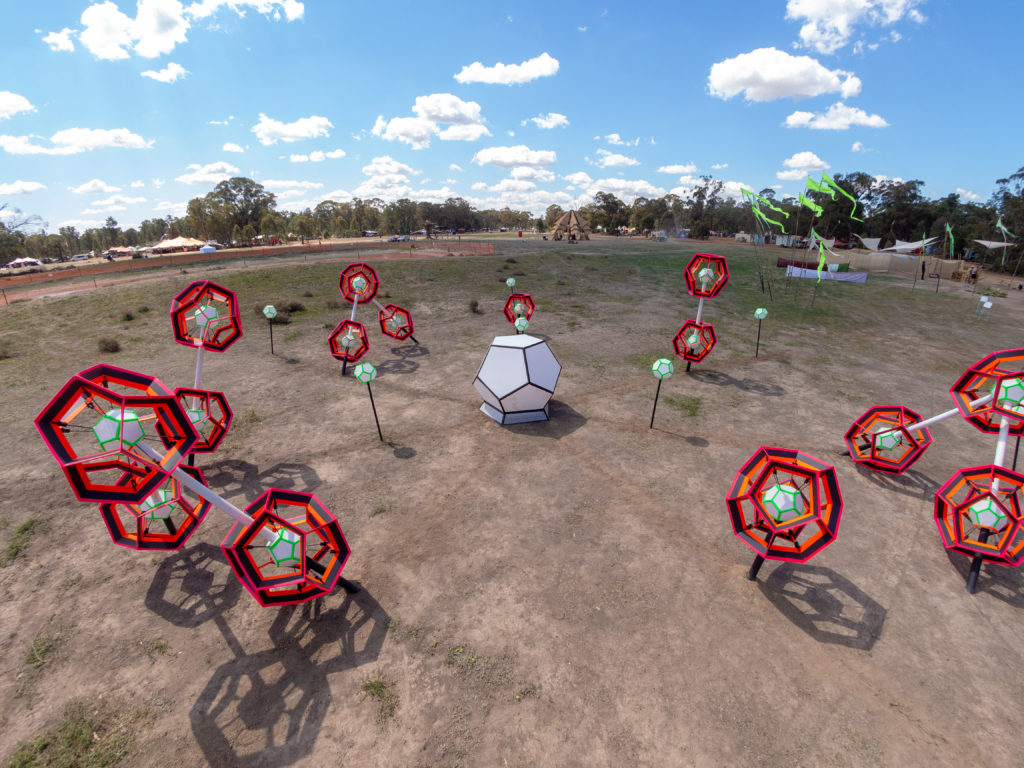
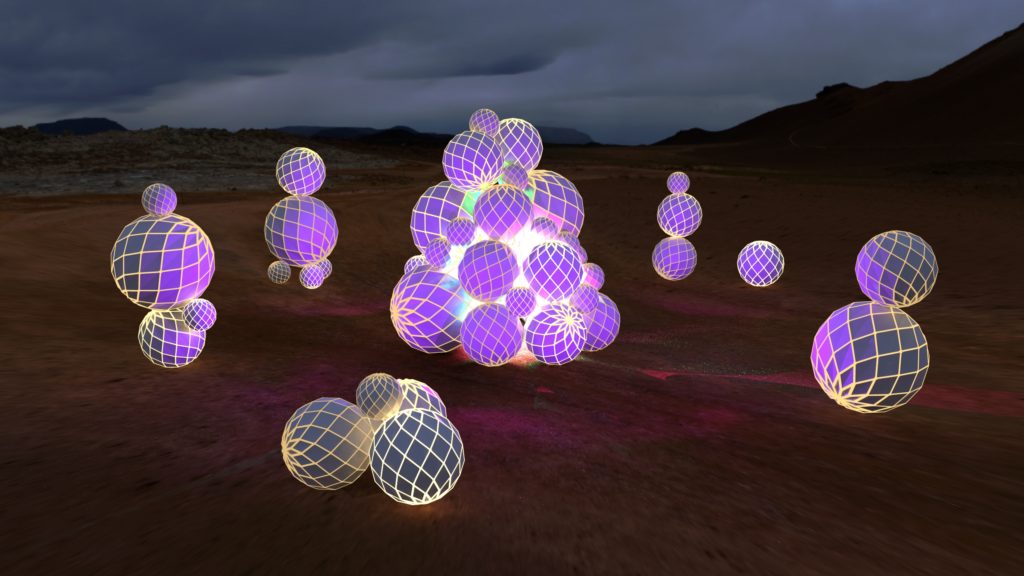
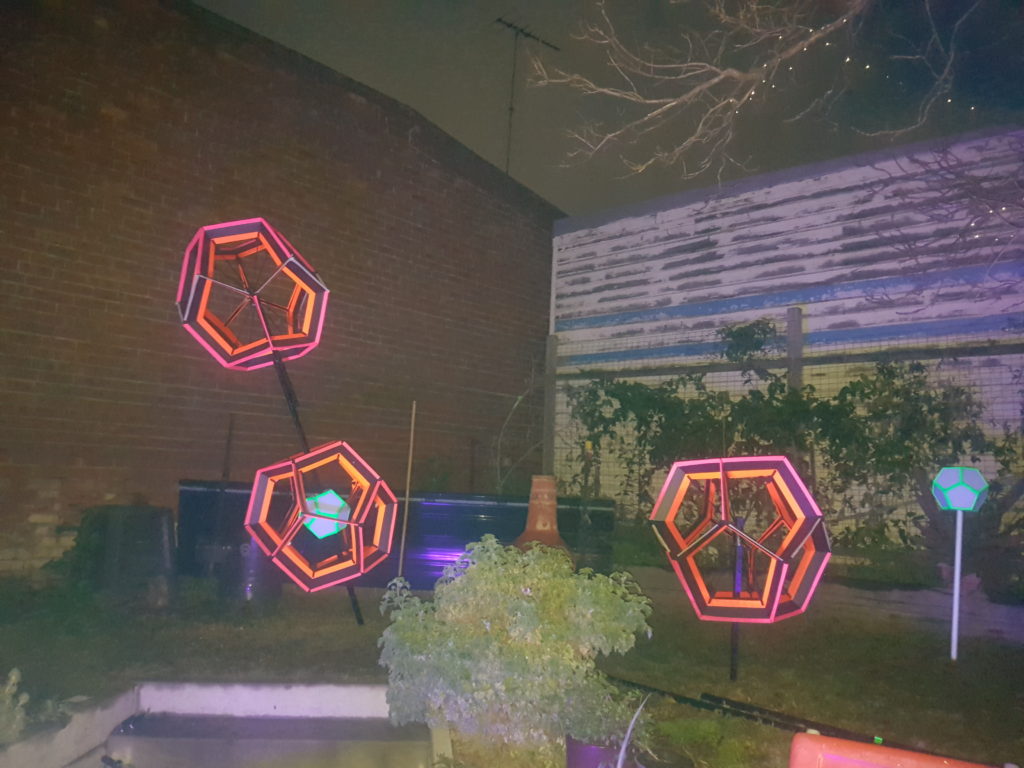
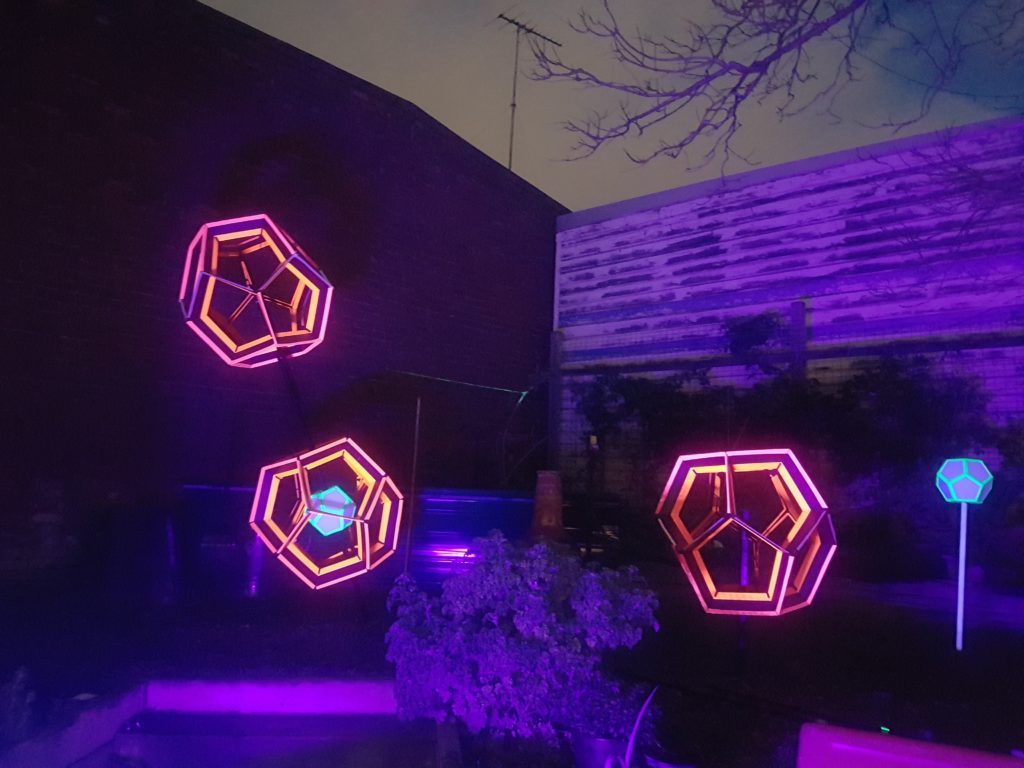
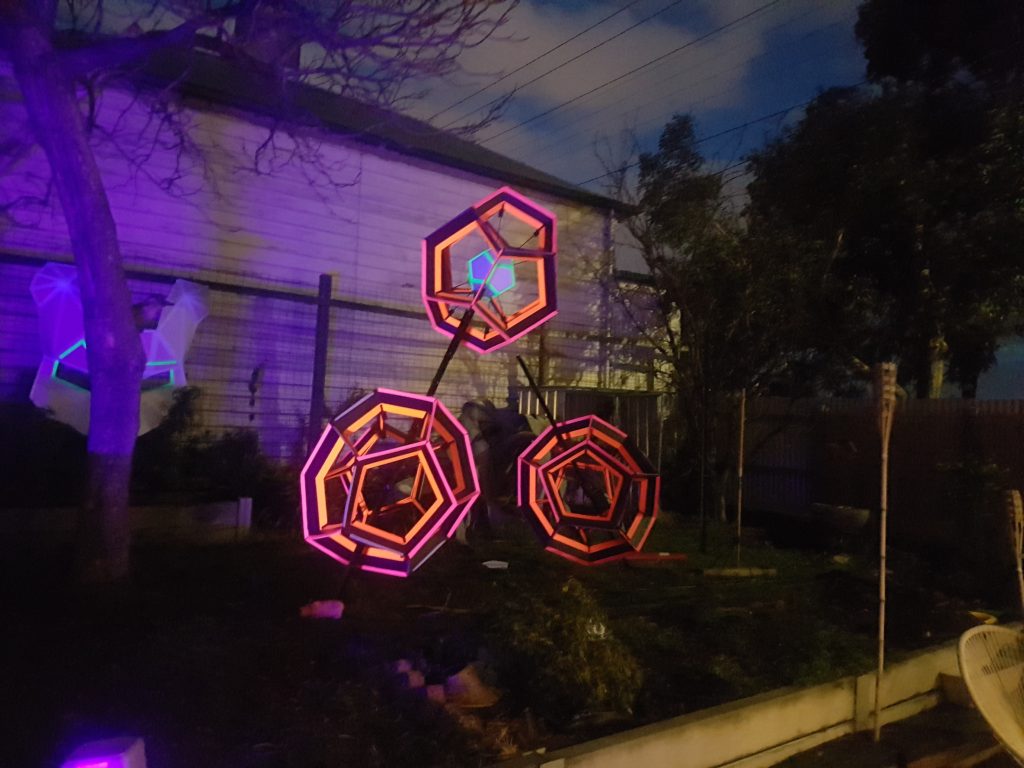
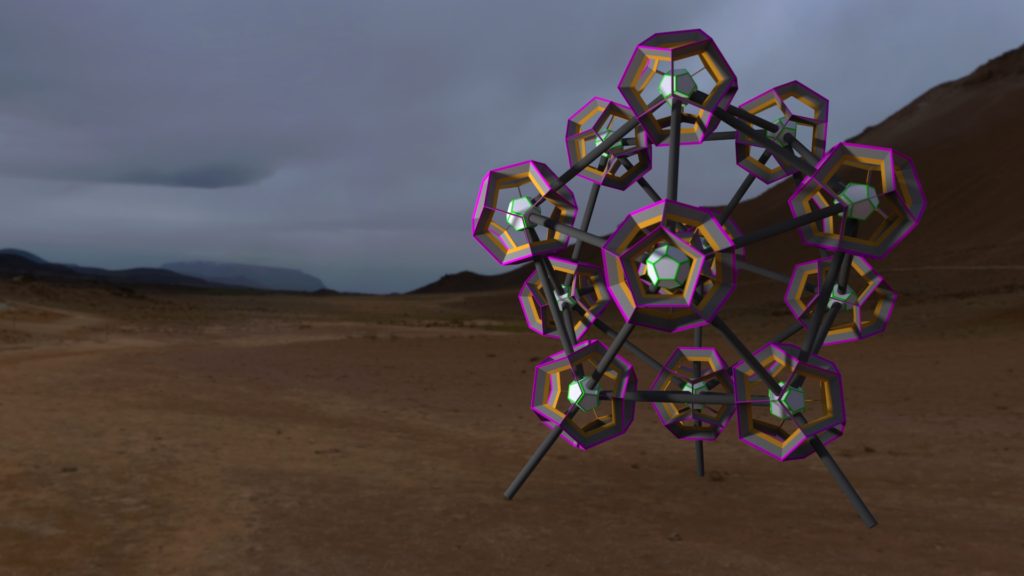
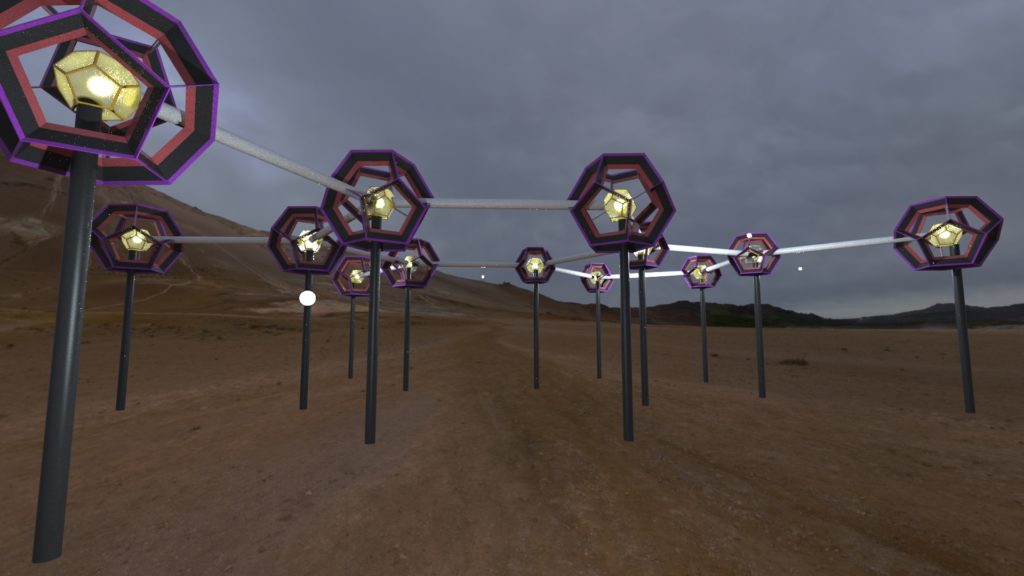
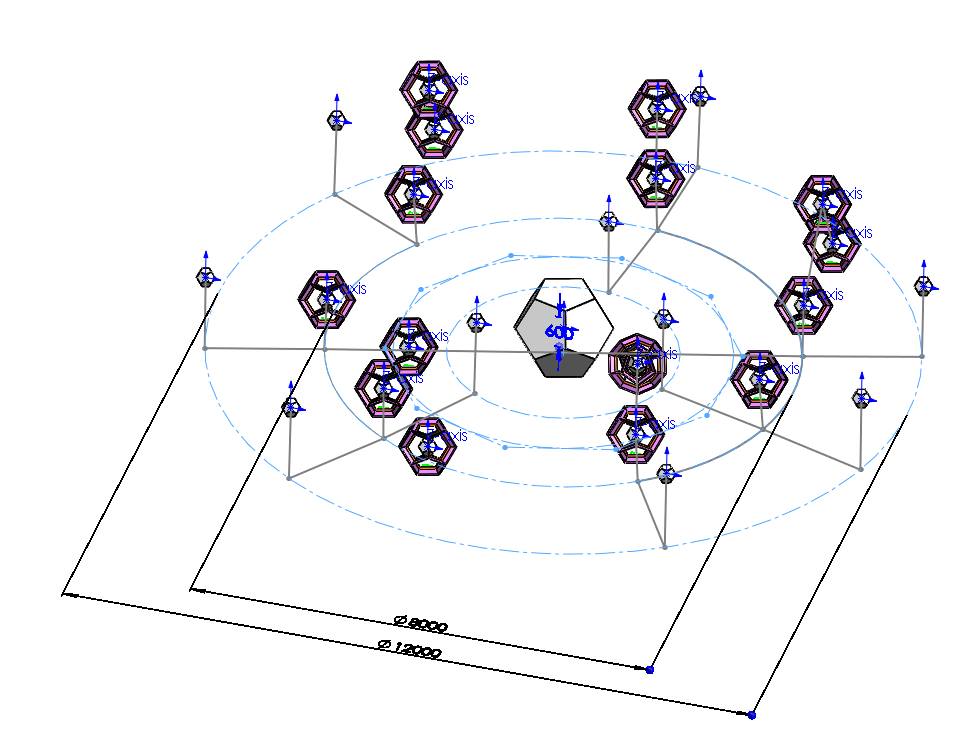
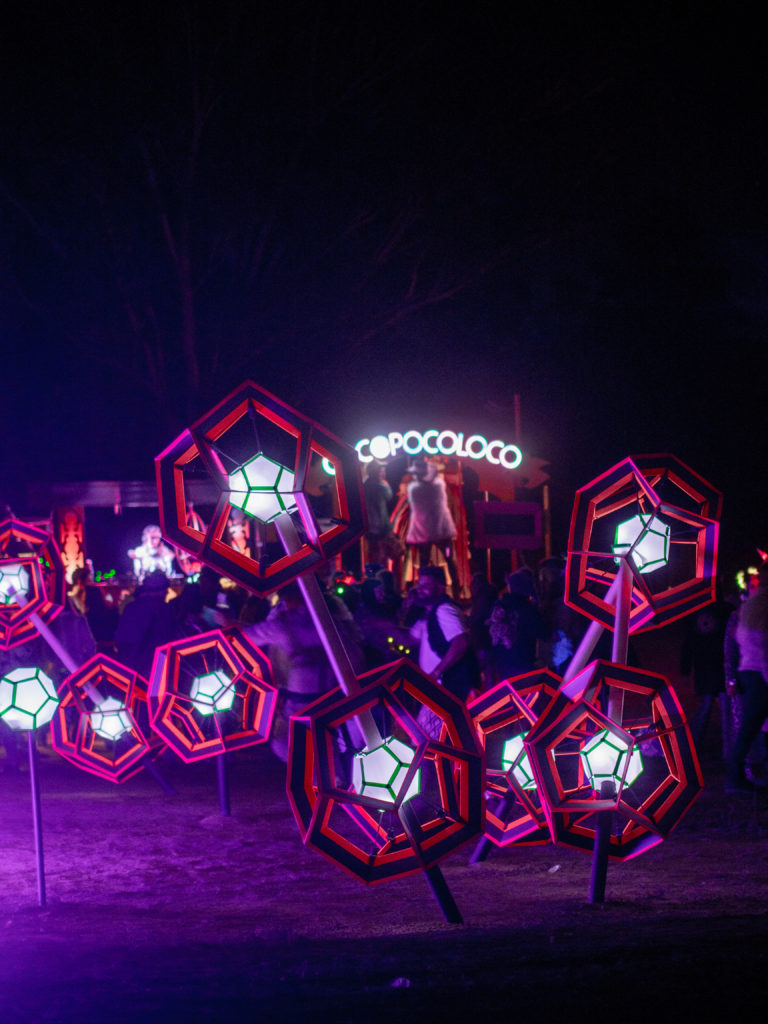
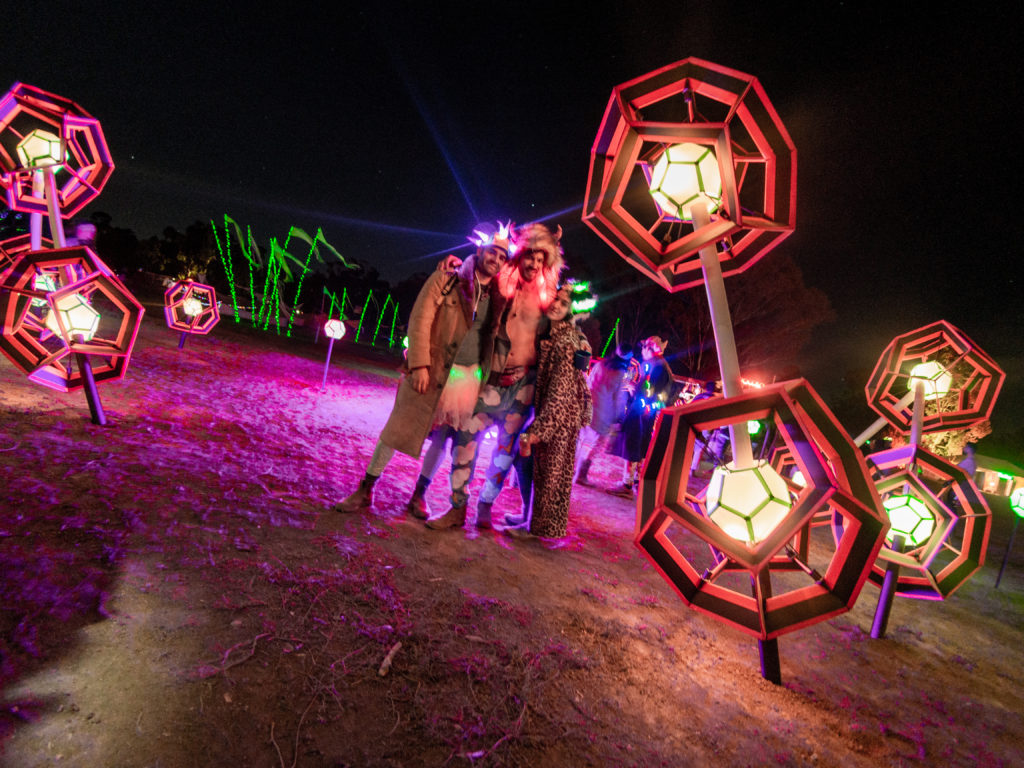
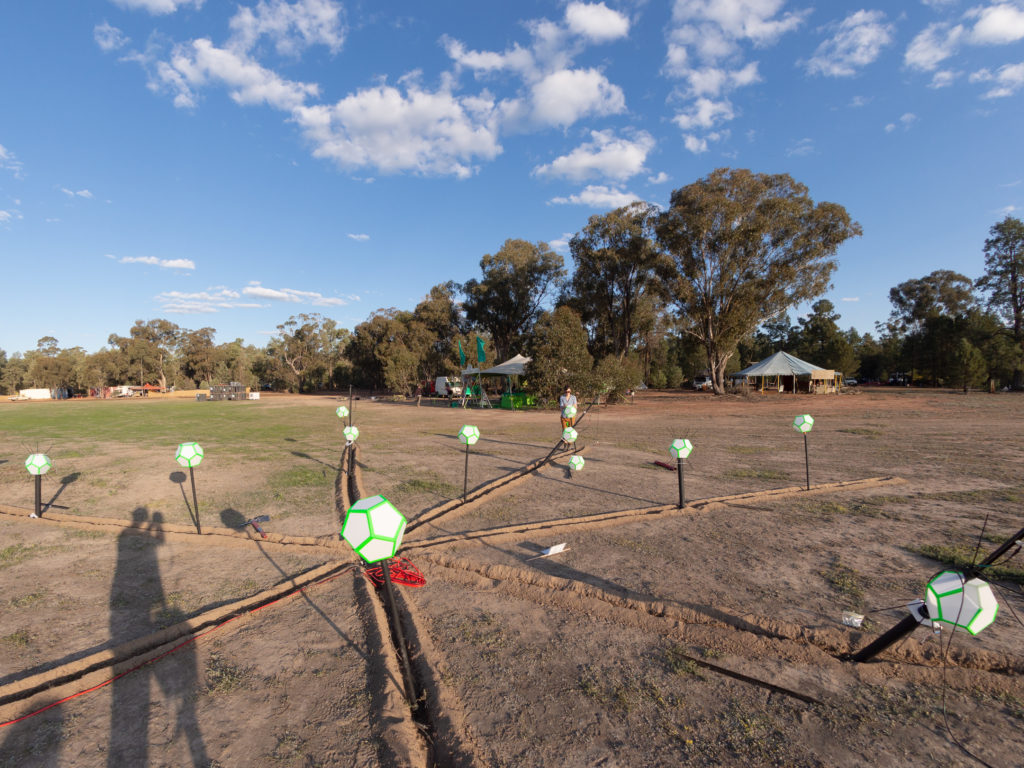
We realised that with our current resources and building blocks, the right thing to do it so arrange our dodecahedrons in a solar system structure – and, it looked great. Awesome. Now everything is properly locked. We can start planning cabling, how to set it up in the field and more. We were very happy with the result. We had 25 nodes in our solar system that is made up of moons and planet. Each planet is built from a “moon” (planet core) and the extruded dodecahedron that wraps it.
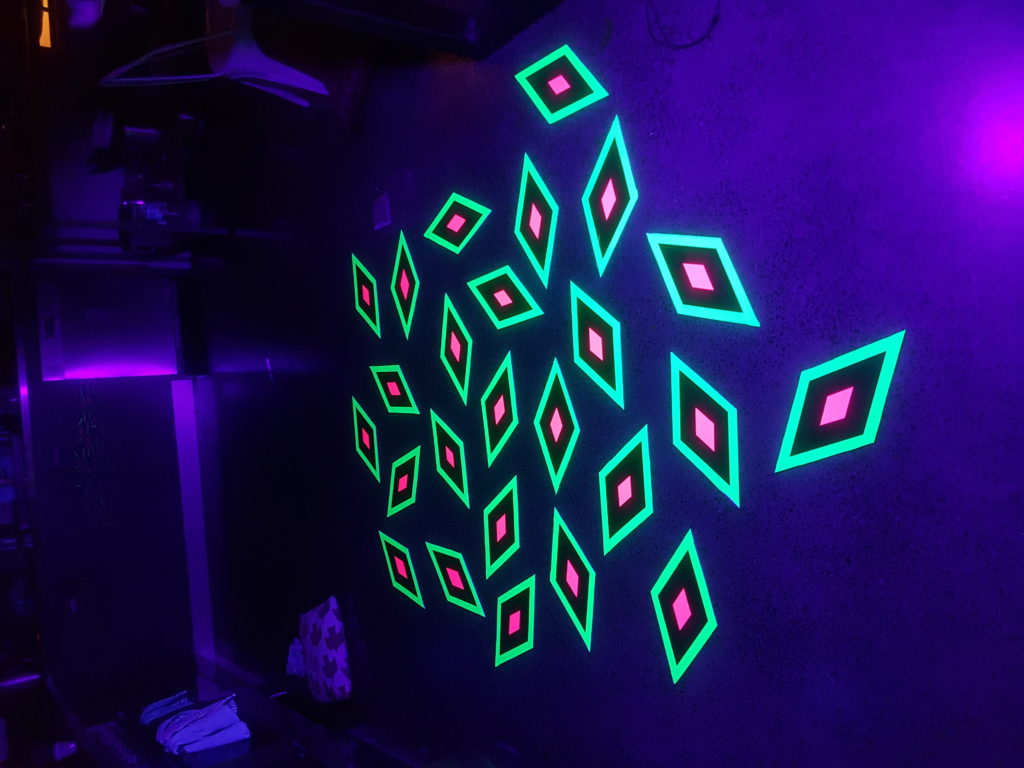
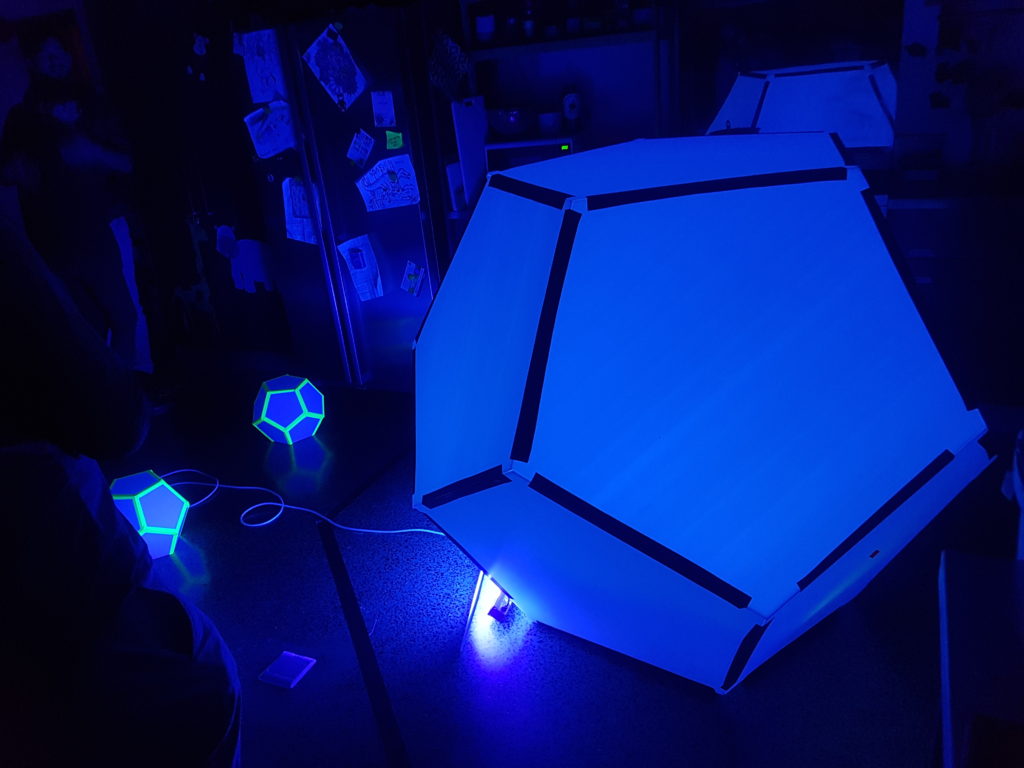
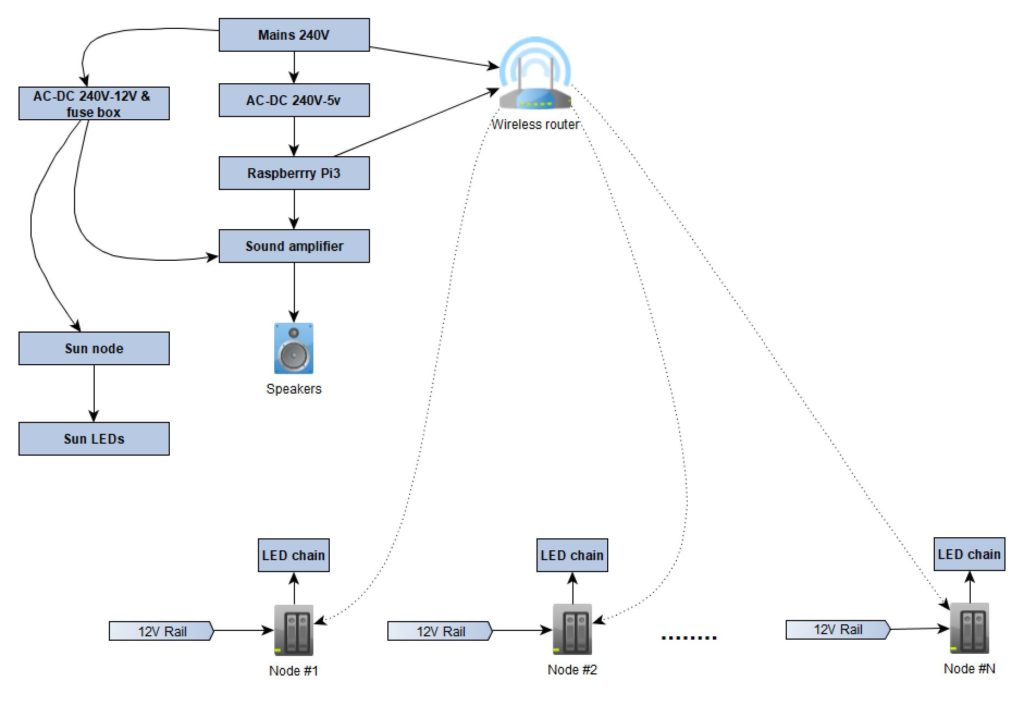
Every planet core/moon will have wireless micro-controller with a chain of LEDs that will illuminate the dodecahedrons inside-out. This is in addition to the UV flood lights. Together with the UV tape the result was impressive.
It also means that in order to make this project look good we will need to write some nice animations that will run though it, use the physical structure while taking the spreading, distances and space into consideration. This this effort Freda and Itamar join, together they wrote 10 animations that were cycled during the night.

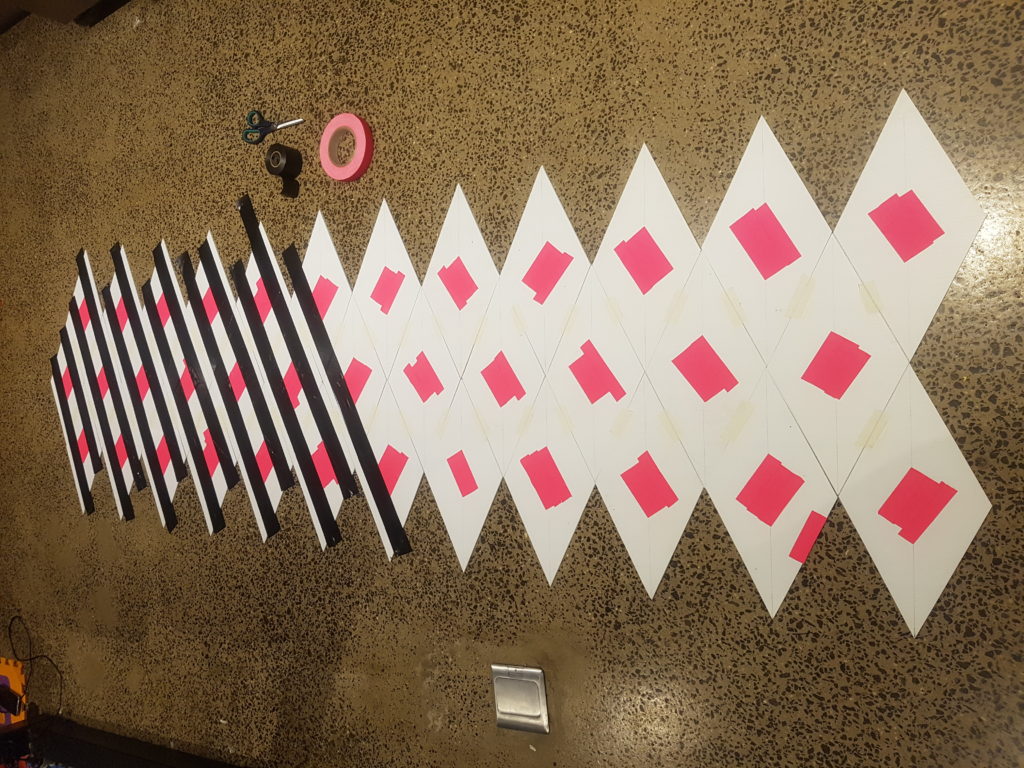
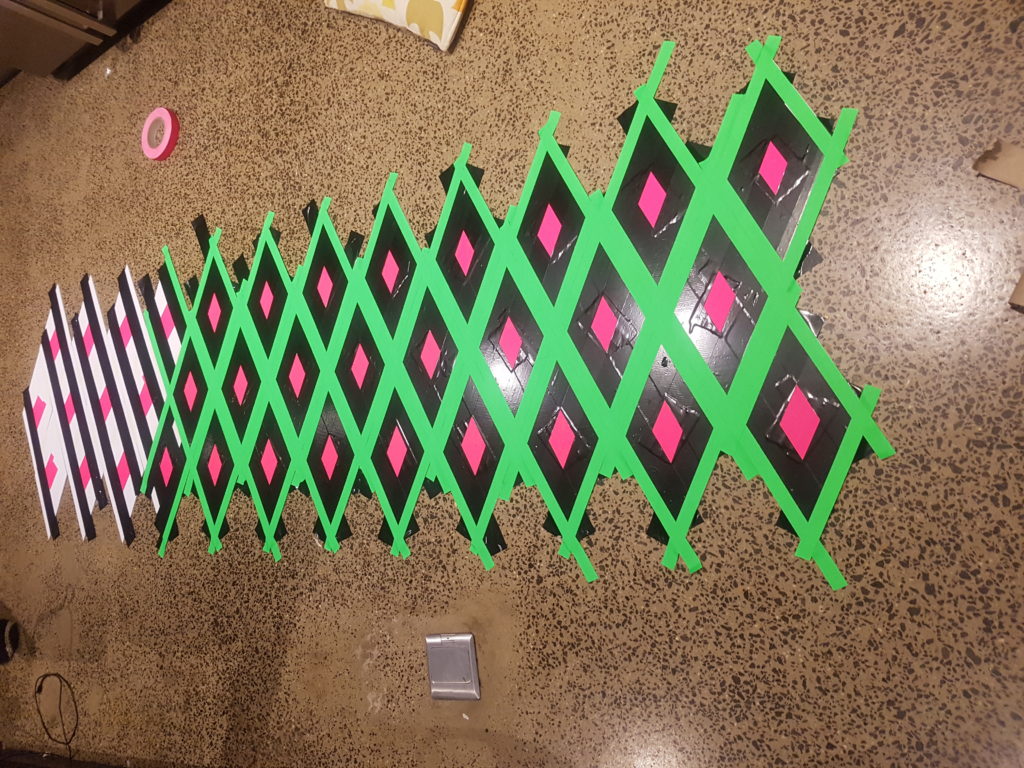
Cabling and soldering:
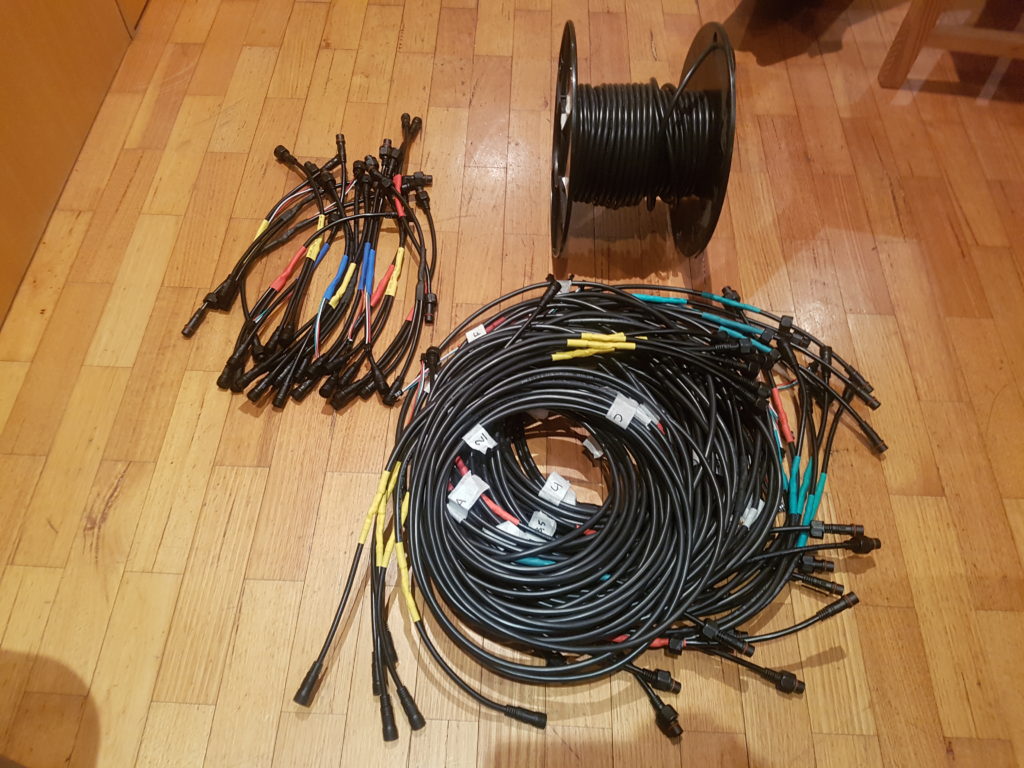
After we had our CAD in place we could calculate all the cables, junctions and connectors that are needed. We ended up with 86m of cables, tens of connectors (and junctions) and a lot of soldering to do. Between building the 30 nodes and almost 100m of cables, I believe that in this project I probably soldered 50% of all the solders that I’ve done in my lifetime. If I’d known that it will be like that I’d go for PCB manufacturing, but, a lot of things were done on-the-fly and in constant motion.
Nasty surprise – The Shift level converter
One very nasty surprise I discovered couple of weeks before Seed is that I miscalculated something in the electronics. Unfortunately, I discovered it only after we finished the cables. The reason was the LED data line’s baud rate.
I won’t dive into the details but one of the chips wasn’t fast enough to handle the required refresh rates of the LEDs. I had to express ship replacement chips (Shift level converter instead of the Logic Level Converter) and then unsolder and resolder each node. Eventually it worked but it was stressful until the point that everything played nice together.
Here comes the sun
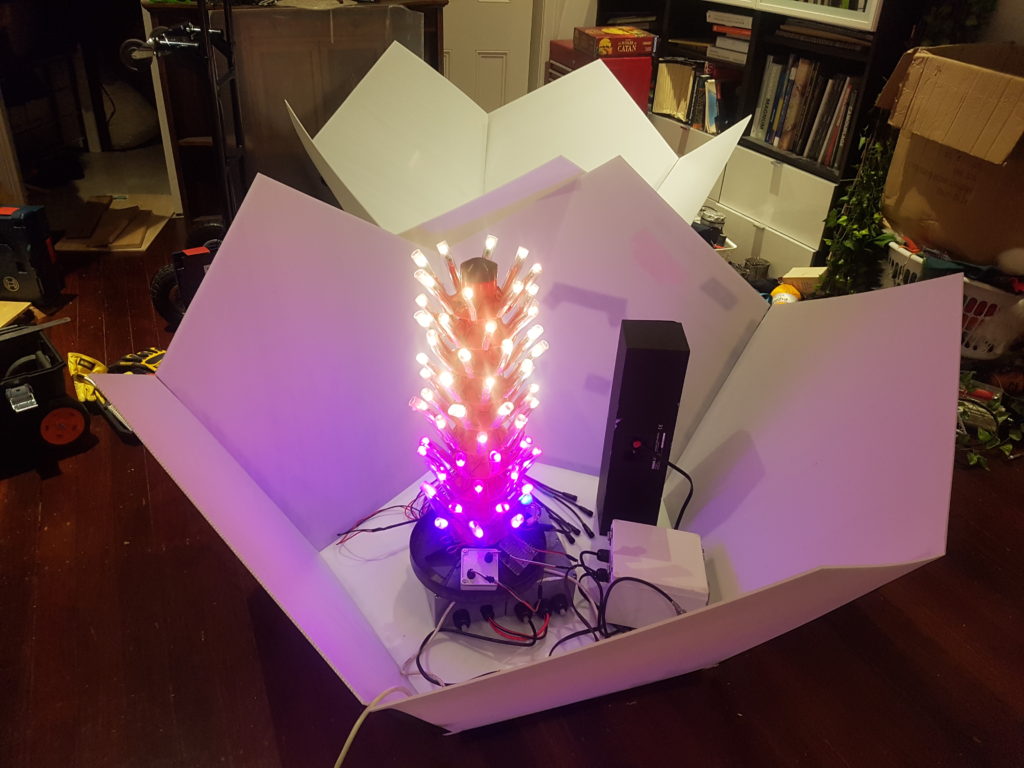
After the concept of the solar system was cemented we needed a centre piece for our artwork. Naturally, we all thought of the centre of the solar system – the sun. It relatively easy to create using the same techniques we created the moons/planet cores – we build a huge dodecahedron that was also the storage place of all of our main equipment – power supplies, speakers, wireless router, cables.
We used the core of Spacecorn and reprogrammed it to have a pinkish flame effect – the result was very nice to the eye. Because of the diffusion of the corflute, the LEDs and placement of the core it looks like a burning surface of a planet. We were very happy with the result.
Music:
We wanted to have a background space atmospheric music, we did some research online and found a British indie composer that had exactly what we needed – the Blue Mask. We bought about 10 tracks and play-looped them.
Comms:
In every project I’m looking for a challenge – to do something that I haven’t done in the past, explore a concept or build an idea that I had for a while. The premise of this project once the electronic was part of it was to create a wireless control system for all the node form a central place. The motivation behind this move is to have an artwork that is covering a large area, being able to time the LEDs/animations without needing to flash every node every time and syncing them. It also allow in the future to support a completely independent self-contained node is a solar-rechargeable power pack is available – this path has a lot of potential that I’m planning to explore in the future.
To accomplish that I designed from scratch a communication protocol that is UDP based. The server sends all the node all the information about the required animation in one UDP packet (datagram). Each node is looking at the same piece of data (payload), but, according to its unique number – it looks at the right place in the payload and extracts the relevant RGB info. The data is being broadcasted every 10ms, which create a frequency update of 100Hz – it means that even if 75% of the UDP packet will be lost the animation will still look good.
At the field it worked flawlessly for 7 days. I’m very satisfied from the outcome.
System Architecture:
Scope creep #4: Simulations & animations:
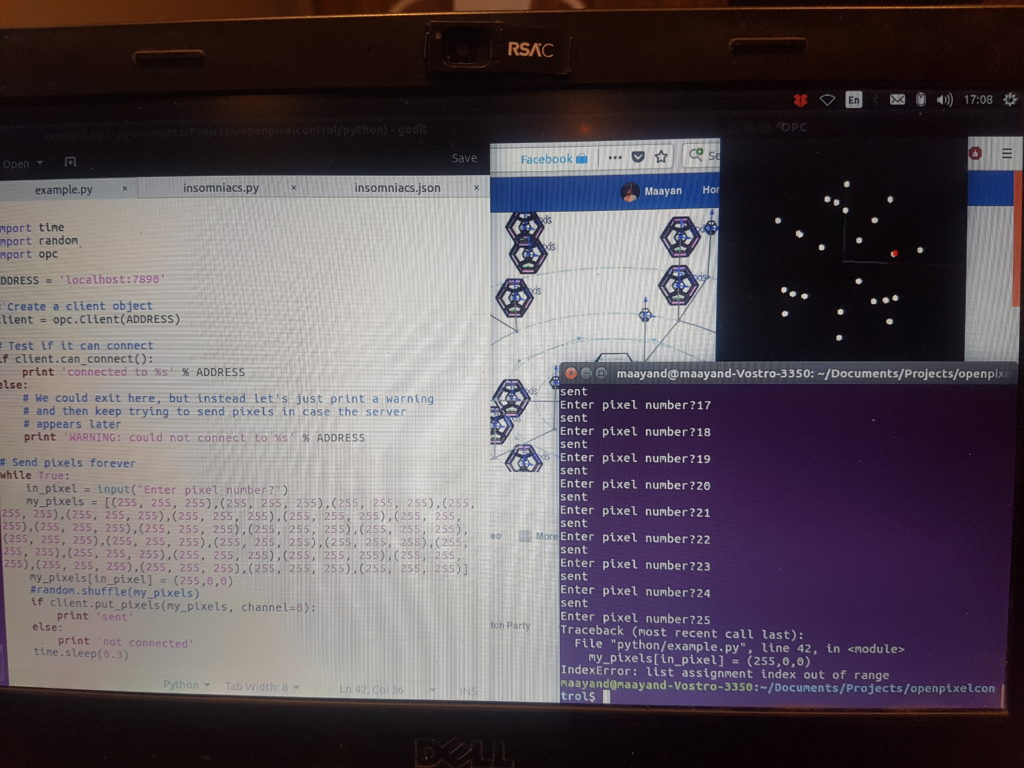
In order to let Itamar and Freda framework to write and test their animation I used OPC (Open Pixel Control) – a free environment for testing and simulating animations. Freda took Darby’s 3D CAD model and using her super 3D Xray vision she created a cartesian representation in OPC that both her and Itamar could test their animations scripts. That way we had ten pre-made animation that were done by Itamar and Freda.. it worked out of the box beautifully.
Conclusion:
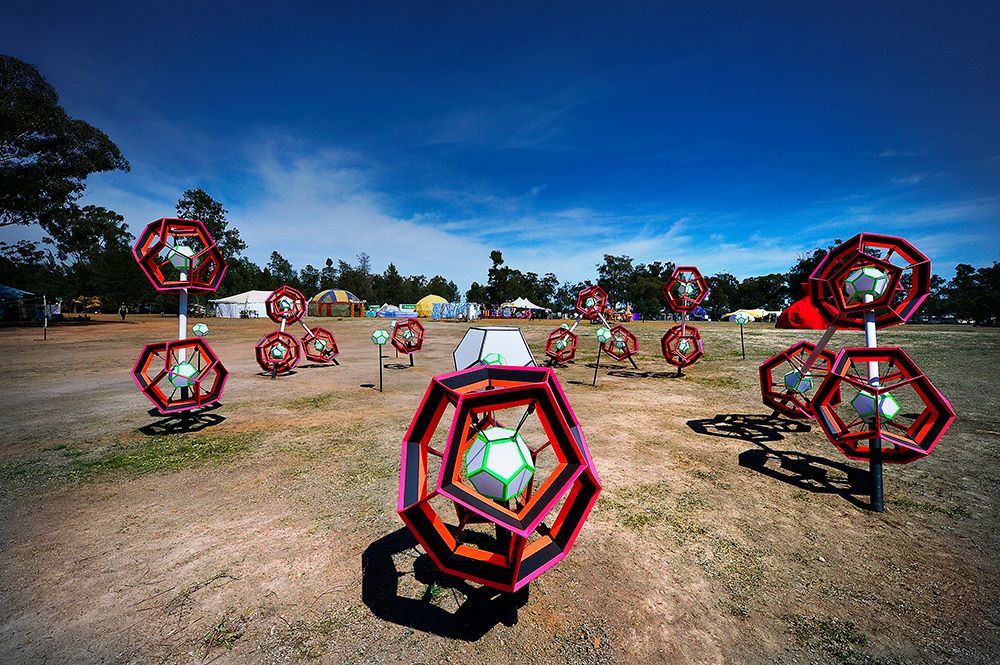
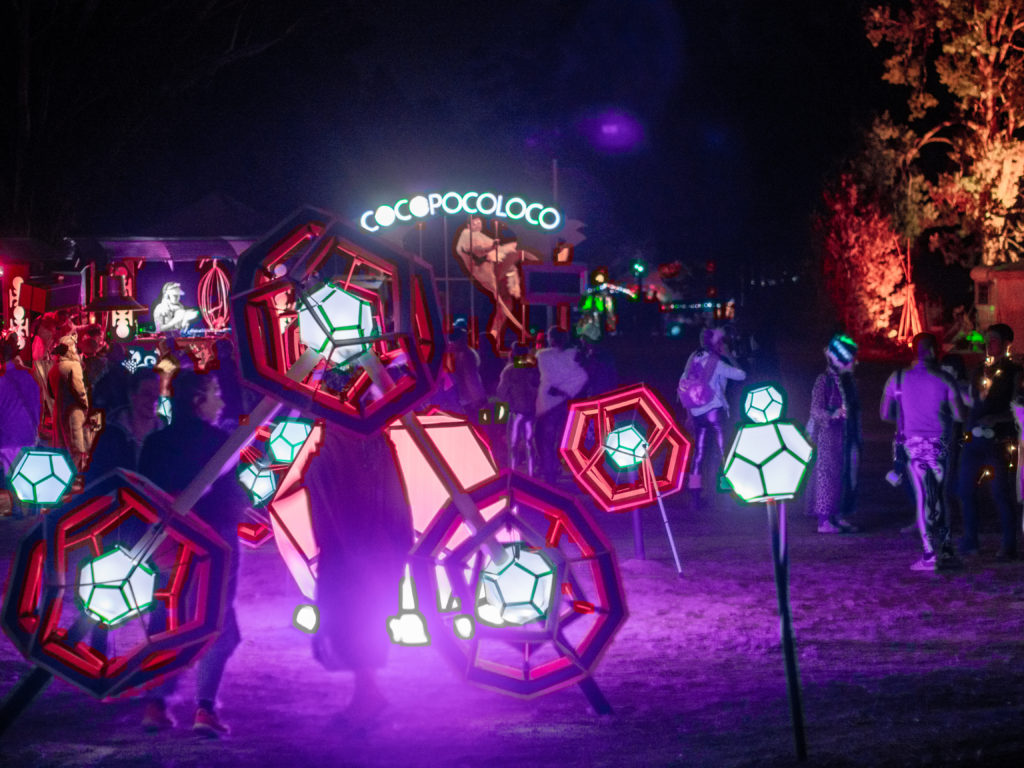
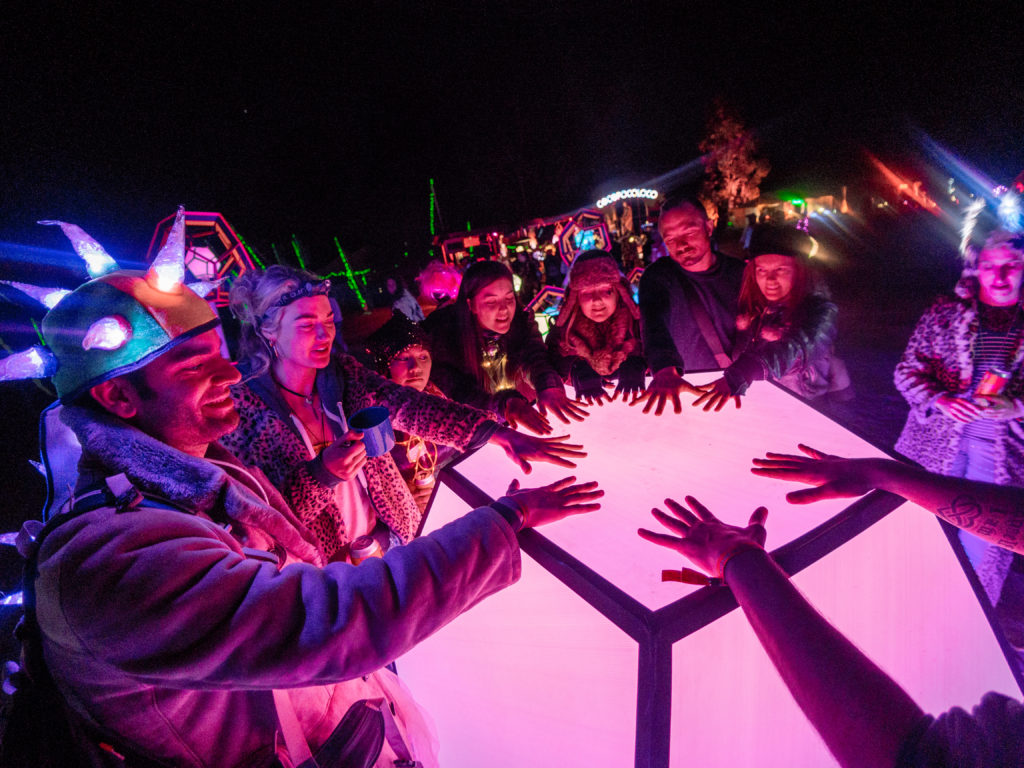
It was a tight and sometimes stressful project, but the outcome was amazing, and we now have in hand a very useful building blick for the next project that could be used as an infrastructure for a lof of artworks. Burning Seed goers spent a lot of time inside the artwork and around it. We even threw a party there thanks to Coco Poco Loco.

Burn Bright )’(